
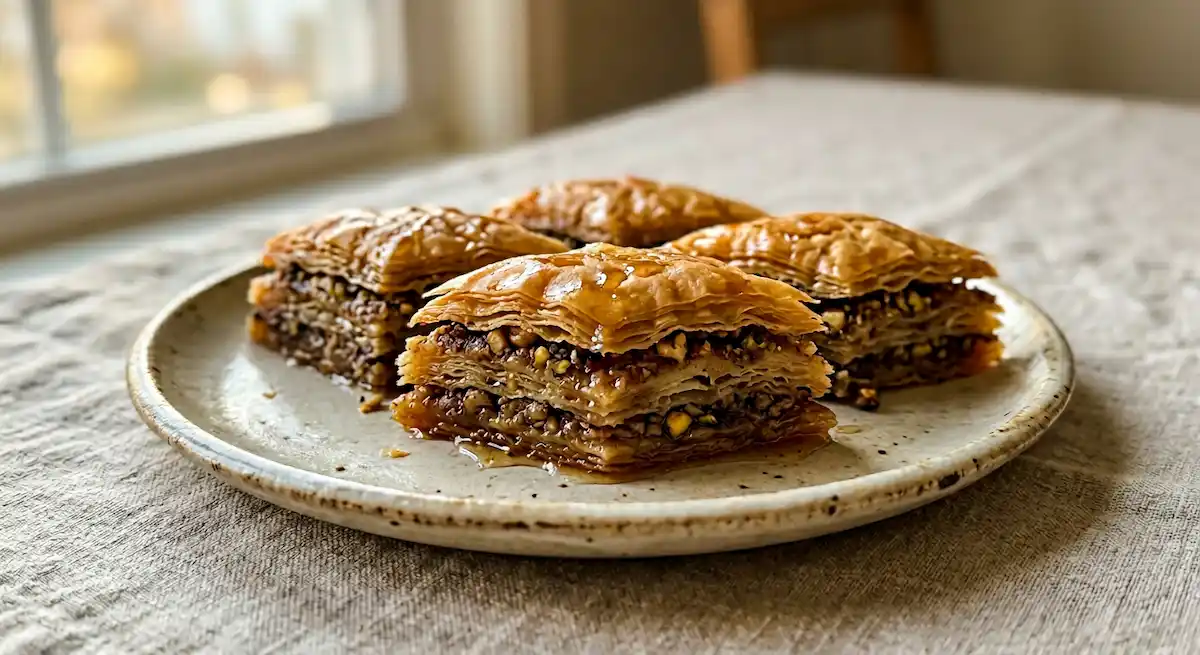
How to Make the Best Greek Baklava in 5 Simple Steps
Have you ever bitten into a piece of Greek baklava and wondered how something so delicate and complex could exist? Those paper-thin layers of buttery phyllo, the aromatic spiced nuts, and that gloriously sticky honey syrup come together to create one of the world’s most celebrated desserts. While Greek baklava might seem intimidating at first, the truth is that anyone can master this ancient recipe with the right guidance and a bit of patience. Throughout this comprehensive guide, you’ll discover exactly how to create authentic Greek baklava in your own kitchen, along with expert tips that ensure every layer turns out perfectly crisp and every bite delivers that signature combination of buttery richness and sweet, nutty bliss.
Table of Contents
What is Greek Baklava
Greek baklava is a traditional Mediterranean pastry made from dozens of paper-thin phyllo dough sheets layered with melted butter, filled with spiced nuts, and soaked in a fragrant honey syrup. Unlike other Middle Eastern versions, the Greek variation typically uses a combination of walnuts and sometimes almonds, flavored with cinnamon and cloves. Moreover, authentic Greek baklava relies heavily on high-quality honey rather than sugar syrup alone, which gives it a distinctive floral sweetness.
The preparation method involves brushing each phyllo sheet individually with butter, creating those impossibly thin, crispy layers that shatter satisfyingly with each bite. After baking until golden and fragrant, the hot pastry gets drenched in cool honey syrup, which seeps between every layer and creates that characteristic sticky texture. The contrast between the crispy phyllo and the syrup-soaked interior is what makes Greek baklava so irresistibly unique.
Furthermore, this dessert has ancient roots dating back to the Ottoman Empire, though Greeks have perfected their own distinctive version over centuries. Each region in Greece has slight variations, but the core elements remain constant: butter, phyllo, nuts, honey, and spices. The result is a dessert that’s simultaneously rich yet light, sweet but not cloying, and complex in both flavor and texture.
Why You Will Love This Greek Baklava
First and foremost, the flavor profile of Greek baklava is absolutely extraordinary. The combination of toasted walnuts, warm cinnamon, aromatic cloves, and floral honey creates a taste that’s both comforting and exotic. Each layer contributes something different the phyllo provides buttery crispness, the nuts offer earthy richness, and the syrup binds everything together with sticky sweetness. Therefore, every bite delivers multiple textures and flavors simultaneously.
Additionally, this dessert is surprisingly forgiving once you understand the basic technique. While working with phyllo dough intimidates many home bakers, the reality is that imperfections don’t matter much because you’re stacking so many layers. A few torn sheets or uneven butter distribution won’t ruin the final result. In fact, the rustic character often adds to the charm of homemade Greek baklava.
Another compelling reason to make this recipe is its impressive presentation. When you serve Greek baklava at gatherings, people assume you’ve spent hours on an incredibly difficult task. However, the actual hands-on work is quite straightforward mostly just brushing butter and layering. The stunning diamond-shaped pieces look professionally made, yet the process requires no special pastry skills.
Moreover, Greek baklava keeps exceptionally well. Unlike many desserts that must be eaten immediately, baklava actually improves over the first day or two as the syrup fully penetrates every layer. You can make it several days ahead of an event, which makes party planning significantly easier. The flavors deepen and meld beautifully with time.
Finally, this recipe connects you to centuries of culinary tradition. Making Greek baklava from scratch is an act of cultural preservation, linking you to countless generations of bakers who have perfected this technique. There’s something deeply satisfying about creating a dessert that has brought joy to people for hundreds of years.
Ingredients
Creating authentic Greek baklava requires quality ingredients, though the list itself is surprisingly short. The success of this dessert depends more on technique than on exotic components.
Main Ingredients
| Ingredient | Amount | Notes |
|---|---|---|
| Phyllo dough | 1 pound (16 ounces) | Keep refrigerated until use; thaw overnight in fridge |
| Unsalted butter | 1½ cups (3 sticks) | Must be melted and kept warm throughout |
| Walnuts | 3 cups chopped | Lightly toast for deeper flavor; pecans work too |
| Ground cinnamon | 2 teaspoons | Freshly ground tastes noticeably better |
| Ground cloves | ½ teaspoon | Just a hint adds warmth without overpowering |
| Granulated sugar | ½ cup | For the nut mixture only |
Honey Syrup Ingredients
| Ingredient | Amount | Notes |
|---|---|---|
| Granulated sugar | 1 cup | Combines with honey for perfect consistency |
| Water | 1 cup | Use filtered water for best flavor |
| Honey | ¾ cup | Greek honey preferred; orange blossom is traditional |
| Fresh lemon juice | 2 tablespoons | Brightens the syrup and prevents crystallization |
| Cinnamon stick | 1 whole | Adds aromatic depth to the syrup |
| Whole cloves | 3 to 4 | Remove before pouring; infuses subtle spice |
The phyllo dough is undoubtedly the most critical component of Greek baklava. This tissue-thin pastry creates those dozens of delicate layers that define the dessert’s texture. Meanwhile, the butter must be unsalted so you can control the flavor precisely, and it needs to stay melted and warm throughout the assembly process. The walnuts provide the nutty foundation, though some Greek families use a combination of walnuts and almonds for added complexity.
How to Make Greek Baklava Step by Step
Making Greek baklava requires patience and attention to detail, but the actual steps are straightforward when you break them down methodically.
Step 1: Prepare the Nut Filling and Phyllo
Start by preheating your oven to 350°F and positioning a rack in the center. In a food processor, pulse the walnuts until they’re coarsely chopped you want pieces roughly the size of lentils, not fine powder. Transfer the chopped nuts to a mixing bowl and stir in the cinnamon, cloves, and sugar until everything is evenly distributed. Set this mixture aside.
Next, remove the phyllo dough from the refrigerator and carefully unroll it on a clean, dry surface. Using a sharp knife, trim the sheets to fit your baking pan if necessaryn a 9×13-inch pan is standard for Greek baklava. Cover the phyllo immediately with a slightly damp kitchen towel to prevent it from drying out while you work. Melt the butter in a small saucepan and keep it warm over very low heat. Brush your baking pan generously with melted butter, coating the bottom and sides completely.
Step 2: Layer the Bottom Phyllo Sheets
Take one sheet of phyllo and lay it flat in the buttered pan. Using a pastry brush, gently brush the entire surface with melted butter, making sure to reach all the edges and corners. Don’t worry about being perfectly even you’re going for coverage, not precision. Lay another phyllo sheet on top and brush it with butter as well. Continue this process until you’ve layered about 8 to 10 sheets of phyllo.
The key here is working quickly but calmly. Phyllo dries out rapidly when exposed to air, so maintain a steady rhythm without rushing. If a sheet tears, simply continue once it’s buttered and layered, tears become invisible. Moreover, keeping the unused phyllo covered with that damp towel throughout the entire process prevents wasteful drying and cracking.
Step 3: Add Nut Layers and Continue Building
Once you’ve created your buttered phyllo base, sprinkle about one-third of the nut mixture evenly across the surface. Don’t press down or compact the nuts; just distribute them in an even layer. Then, layer 2 to 3 sheets of phyllo on top, brushing each one with butter. Add another third of the nut mixture, followed by 2 to 3 more buttered phyllo sheets. Repeat this process once more with the remaining nuts.
This layering technique creates distinct nut layers separated by buttery phyllo, which is the structural hallmark of Greek baklava. The top layer should be your final portion of nuts, which will eventually sit beneath the crowning phyllo layers. Take your time with this step because even distribution of nuts ensures every piece tastes consistent.
Step 4: Top with Final Phyllo Layers and Score
After adding your last nut layer, begin topping the Greek baklava with the remaining phyllo sheets, brushing each one individually with melted butter. You should have about 8 to 10 sheets for this top layer, matching the bottom. The final sheet should receive an especially generous butter coating because this will become the golden, crispy top crust.
Using a sharp knife, carefully cut the unbaked baklava into traditional diamond shapes. Start by making straight cuts lengthwise to create strips about 1½ inches wide. Then, make diagonal cuts across the strips to form diamond shapes. Cut all the way through to the bottom of the pan this is crucial because it allows the syrup to penetrate later. Some bakers prefer squares instead of diamonds, which is perfectly acceptable and easier to cut.
Step 5: Bake and Apply Honey Syrup
Place the pan in your preheated oven and bake for 45 to 50 minutes, until the Greek baklava turns a beautiful golden brown and smells incredibly fragrant. The phyllo should be crisp and the butter should have created lovely browned edges around each piece. While the baklava bakes, prepare your honey syrup by combining sugar, water, honey, lemon juice, cinnamon stick, and cloves in a saucepan. Bring this mixture to a boil, then reduce the heat and simmer for about 10 minutes until it thickens slightly. Remove the whole spices and let the syrup cool to room temperature.
When the baklava comes out of the oven, immediately pour the cooled syrup evenly over the hot pastry. You’ll hear a satisfying sizzle as the syrup makes contact with the crispy phyllo. The temperature contrast is essential hot baklava with cool syrup ensures the phyllo absorbs the liquid properly while maintaining some crispness. Let the Greek baklava sit uncovered at room temperature for at least 4 hours, preferably overnight, before serving. This resting period allows the syrup to fully penetrate and the flavors to develop completely.
Storage and Make-Ahead Tips
One of the greatest advantages of Greek baklava is its exceptional keeping qualities. Store the finished baklava at room temperature, covered loosely with aluminum foil or in an airtight container. It will stay fresh and delicious for up to 2 weeks. In fact, many bakers insist that baklava tastes even better on the second or third day after the syrup has fully saturated every layer and the flavors have melded completely.
However, avoid refrigerating Greek baklava because cold temperatures make the phyllo layers lose their crispness and become chewy rather than flaky. The honey syrup contains enough sugar to preserve the dessert safely at room temperature. Just make sure to keep it away from direct sunlight and heat sources, which could make the butter in the layers go rancid.
For make-ahead preparation, you can actually assemble the unbaked Greek baklava up to one day in advance. Layer everything as directed, cover the pan tightly with plastic wrap, and refrigerate overnight. When you’re ready to bake, let the pan sit at room temperature for 30 minutes, then score and bake as directed. This strategy works beautifully for holiday meal planning when oven space and time are at a premium.
Additionally, baked and syruped baklava freezes reasonably well, though the texture won’t be quite as crisp as fresh. Wrap individual pieces tightly in plastic wrap, then place them in a freezer-safe container for up to 3 months. Thaw at room temperature for several hours before serving. The flavor remains excellent even if the texture softens slightly.
Common Mistakes and How to Fix Them
One of the most frequent errors when making Greek baklava is using phyllo dough that hasn’t been properly thawed. Frozen phyllo must thaw slowly in the refrigerator overnight never at room temperature or in the microwave. Rushing this process causes the delicate sheets to crack and tear beyond usability. Therefore, always plan ahead and give your phyllo adequate thawing time.
Another common mistake involves applying too much or too little butter between the layers. Too much butter makes the baklava greasy and heavy, while too little results in dry, brittle phyllo that doesn’t hold together. The right amount creates a light coating on each sheet without pooling in the corners. Keep your pastry brush moderately loaded and work with smooth, even strokes.
Moreover, many home bakers fail to cut the Greek baklava before baking. Attempting to cut through dozens of syrup-soaked phyllo layers after baking is nearly impossible without creating a mess. Always score your pieces before the pan goes into the oven. Use a sharp knife and cut decisively through all the layers in one smooth motion rather than sawing back and forth.
Furthermore, pouring hot syrup over hot baklava is a critical error that results in soggy, limp pastry rather than crispy layers. The temperature contrast between cool syrup and hot pastry is what allows the phyllo to absorb sweetness while maintaining structural integrity. Therefore, always let your syrup cool completely while the baklava bakes.
Finally, don’t rush the resting period after applying the syrup. Impatient bakers who serve Greek baklava too soon miss out on the full flavor development and optimal texture. Give the dessert at least 4 hours, preferably overnight, to fully absorb the syrup and reach its peak deliciousness.
Variations
While traditional Greek baklava is absolutely perfect as written, several variations can add interesting twists to this classic dessert. For a different flavor profile, try using pistachios instead of or in addition to walnuts. Pistachio baklava has a gorgeous green color and a slightly sweeter, more delicate flavor. Combine equal parts pistachios and walnuts for a beautiful balance of flavors and colors.
Another popular variation involves adding orange zest to both the nut mixture and the honey syrup. The citrus brightness cuts through the richness beautifully and adds a refreshing dimension to the Greek baklava. Use the zest of one large orange, being careful to avoid the bitter white pith. This variation is especially popular in certain Greek islands where orange groves are abundant.
For a chocolate twist that still honors the traditional preparation method, try adding finely chopped dark chocolate to the nut layers. Use about ½ cup of chocolate chips or chopped chocolate distributed among the nut layers. The chocolate melts during baking, creating pockets of rich, bittersweet flavor that complement the honey syrup surprisingly well.
Additionally, some bakers create a lighter version by using a combination of butter and olive oil for brushing the phyllo layers. Replace half the butter with high-quality extra virgin olive oil for a slightly different flavor profile and reduced saturated fat content. This variation is actually closer to some ancient preparation methods and creates equally delicious results.
For special occasions, you can make individual Greek baklava rolls instead of the traditional layered pan version. Cut phyllo sheets into strips, brush with butter, add nut filling, and roll them into cigar shapes. Arrange the rolls in a pan, bake until golden, and drench with honey syrup. These individual portions make elegant presentations for dinner parties.
Serving Suggestions
Greek baklava is traditionally served as a small dessert portion because of its richness and sweetness. Cut pieces are typically enjoyed with strong Greek or Turkish coffee, which provides a bitter contrast to the sweet pastry. The coffee’s intensity balances the honey perfectly, creating a classic Mediterranean afternoon ritual.
For special occasions, serve Greek baklava alongside other Greek desserts like galaktoboureko or loukoumades to create an impressive dessert spread. Add fresh fruit like figs, grapes, or pomegranate seeds to the platter for color and to provide lighter options for guests who might find baklava too rich on its own.
Moreover, baklava pairs beautifully with vanilla ice cream or lightly sweetened whipped cream. The cold, creamy element provides temperature contrast and helps balance the intense sweetness. A scoop of vanilla ice cream melting over a piece of room-temperature Greek baklava creates an absolutely decadent dessert experience.
For a stunning presentation at gatherings, arrange diamond-shaped pieces on a large platter in overlapping rows, drizzle with extra honey, and garnish with chopped pistachios or a light dusting of cinnamon. The visual appeal of properly cut and arranged baklava makes it a centerpiece-worthy dessert that impresses before anyone even takes a bite.
Additionally, consider serving Greek baklava with herbal tea infusions like chamomile or mint tea. These gentle, aromatic teas complement the honey and spices without competing with the dessert’s complex flavors. This combination is especially popular during warm weather when heavy coffee feels too intense.
Frequently Asked Questions
Can I make Greek baklava without phyllo dough from scratch?
While technically possible, making phyllo dough from scratch requires specialized skills and equipment that most home bakers don’t possess. Store-bought frozen phyllo produces excellent results and is what the vast majority of Greek home cooks use. Therefore, don’t feel like you’re taking shortcuts quality frozen phyllo is the standard choice even for experienced bakers.
Why is my Greek baklava soggy instead of crispy?
Soggy baklava usually results from pouring hot syrup over hot pastry. Always let your syrup cool to room temperature before applying it to the hot baked Greek baklava. Additionally, make sure you’re using enough butter between the layers and baking until the phyllo is deeply golden brown, not pale.
How do I prevent phyllo dough from drying out while working?
Keep unused phyllo sheets covered with a lightly dampened kitchen towel at all times. Work with one sheet at a time, immediately covering the stack after removing each sheet. Don’t use a soaking wet towel, just slightly damp too much moisture makes the phyllo sticky and difficult to separate.
Can I reduce the sugar in Greek baklava?
You can reduce the sugar in the syrup slightly, but keep in mind that the syrup’s consistency depends partly on the sugar content. Reducing it by more than 25% may result in a thinner syrup that doesn’t coat the layers properly. The Greek baklava is meant to be a rich, sweet dessert enjoyed in small portions.
What’s the difference between Greek and Turkish baklava?
Greek baklava typically uses walnuts, features honey prominently in the syrup, and often includes cinnamon and cloves. Turkish baklava more commonly uses pistachios, relies on sugar syrup, and may include rosewater or orange blossom water. The phyllo layering technique is similar, but the flavor profiles differ significantly.
How far in advance can I make Greek baklava?
You can make Greek baklava up to 2 weeks ahead if stored properly at room temperature in an airtight container. In fact, many bakers prefer making it at least 2 days in advance to allow the flavors to fully develop and the syrup to penetrate completely.
Can I use salted butter instead of unsalted?
While you can technically use salted butter, unsalted is strongly preferred because it allows you to control the flavor precisely. The Greek baklava recipe already contains enough complexity without adding unexpected saltiness that can throw off the delicate balance of sweet and spice.
Creating authentic Greek baklava in your own kitchen is a rewarding culinary adventure that connects you to centuries of Mediterranean tradition. While the process requires patience and careful attention to detail, the actual techniques are straightforward and completely manageable for home bakers of any skill level. Those dozens of buttery, flaky layers combined with spiced nuts and fragrant honey syrup create a dessert that’s truly unforgettable. Whether you’re making Greek baklava for a special celebration or simply treating yourself to something extraordinary, this recipe delivers consistent, spectacular results that will have everyone asking for your secret. So gather your ingredients, set aside an afternoon, and discover why this ancient dessert has captivated people across generations and continents.