
How to Make Perfect Hard Boiled Eggs Every Time in 7 Easy Steps
Have you ever peeled a hard boiled egg only to find a rubbery white, a chalky yolk, or that dreaded green ring around the edge? You’re not alone. Despite being one of the simplest foods to prepare, hard boiled eggs often turn out less than perfect because of tiny timing and temperature mistakes. However, once you understand the science behind the process, you’ll make flawless hard boiled eggs every single time. This comprehensive guide walks you through the exact method I’ve tested dozens of times, plus troubleshooting tips, storage advice, and creative ways to use your perfectly cooked eggs.
Table of Contents
What is Hard Boiled Eggs
Hard boiled eggs are whole eggs cooked in their shells in boiling or simmering water until both the white and yolk are completely firm and set. Unlike soft boiled eggs, which have runny or jammy yolks, hard boiled eggs feature a fully cooked yolk with a firm, creamy texture. The cooking process denatures the proteins in both the egg white and yolk, transforming them from liquid to solid through the application of heat.
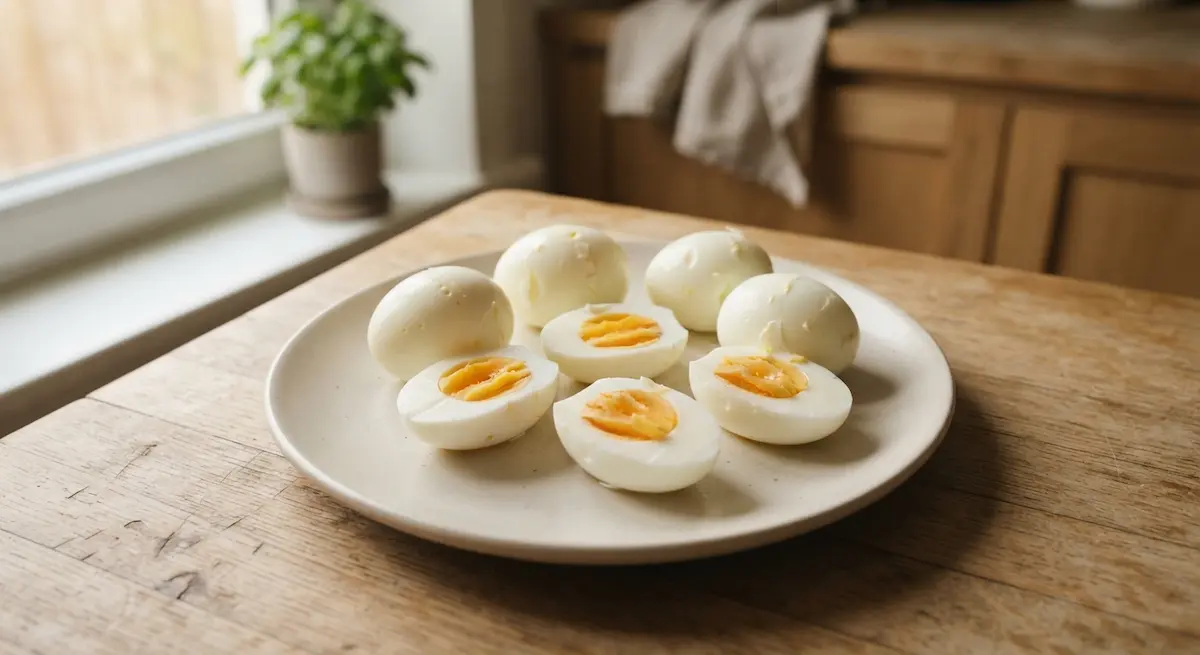
The ideal hard boiled egg has a tender white that isn’t rubbery, a yolk that’s cooked through but still creamy and bright yellow, and no greenish-gray ring around the yolk. That ring appears when eggs are overcooked, causing a chemical reaction between the sulfur in the white and the iron in the yolk. Therefore, proper timing and temperature control are essential for achieving the perfect result.
People have been cooking hard boiled eggs for centuries as a simple, protein-rich food that requires no additional ingredients. They’re incredibly versatile, appearing in everything from breakfast plates to salads, sandwiches, and snacks. Moreover, they’re one of the most economical protein sources available, making them a staple in kitchens worldwide.
Why You Will Love This Hard Boiled Eggs
This method for making hard boiled eggs eliminates all the guesswork and delivers consistent results every single time. First, it produces eggs that peel effortlessly, which is perhaps the most frustrating aspect of cooking hard boiled eggs. The technique ensures the membrane separates cleanly from the white, so you’ll never struggle with shells that take half the egg white with them.
Additionally, this approach prevents overcooking, which means no more rubbery whites or that unappetizing green ring around the yolk. The yolks turn out perfectly creamy and bright yellow, exactly as they should be. In contrast to methods that require constant monitoring, this technique is almost hands-off once you start the timer.
Furthermore, hard boiled eggs are incredibly practical for meal prep. You can cook a dozen at once and store them in the refrigerator for quick breakfasts, salads, or snacks throughout the week. They’re naturally gluten-free, dairy-free, and packed with high-quality protein, healthy fats, and essential nutrients like vitamin D, B vitamins, and choline. As a result, they fit seamlessly into virtually any eating plan, from keto to paleo to traditional balanced diets.
The simplicity is another major advantage. You need just two ingredients: eggs and water. No special equipment, no complicated techniques, and no culinary expertise required. Even if you’ve never cooked before, you can master hard boiled eggs with this straightforward method.
Ingredients
Main Ingredients
| Ingredient | Amount | Notes |
|---|---|---|
| Large eggs | As many as needed | Fresh or older eggs both work; older eggs peel more easily |
| Water | Enough to cover eggs by 1 inch | Use cold tap water to start |
| Ice | 2-3 cups | For the ice bath to stop cooking immediately |
The beauty of hard boiled eggs lies in their simplicity. You truly only need eggs and water, though the ice bath is technically optional but highly recommended. Older eggs, typically those that have been refrigerated for a week or two, tend to peel more easily than farm-fresh eggs because the pH of the egg white increases over time, making the membrane less likely to stick. However, you can achieve great results with eggs of any age if you follow the method carefully.
How to Make Hard Boiled Eggs Step by Step
Step 1: Arrange the Eggs in Your Pot
Place your eggs in a single layer at the bottom of a saucepan or pot. Make sure they’re not stacked or crowded, as this ensures even cooking. Choose a pot that’s large enough to hold all your eggs comfortably without overlapping. Then, add cold water until it covers the eggs by about one inch. Starting with cold water and cold eggs helps prevent cracking and promotes even cooking from the outside in.
Step 2: Bring the Water to a Rolling Boil
Place the pot on the stove over high heat and bring the water to a full, rolling boil. You’ll know it’s ready when you see large bubbles breaking the surface continuously. Don’t cover the pot during this stage, as you want to monitor the boiling point carefully. This step typically takes about 6 to 8 minutes, depending on your stove and the number of eggs.
Step 3: Remove from Heat and Cover
As soon as the water reaches a rolling boil, immediately remove the pot from the heat. Then, cover it with a tight-fitting lid. This is where the magic happens. The residual heat in the water will continue cooking the eggs gently and evenly. Because you’ve removed the pot from direct heat, you eliminate the risk of overcooking that causes rubbery whites and green yolks.
Step 4: Let the Eggs Sit
Set a timer for exactly 10 to 12 minutes. For large eggs, 10 minutes produces fully set yolks that are still slightly creamy in the very center, while 12 minutes gives you completely firm yolks throughout. If you’re using extra-large eggs, add one minute. For medium eggs, subtract one minute. During this time, the eggs finish cooking in the hot water without any additional heat source.
Step 5: Prepare an Ice Bath
While the eggs are sitting, fill a large bowl with ice and cold water. You want enough ice to keep the water very cold even after adding hot eggs. This ice bath serves a critical purpose: it stops the cooking process instantly, preventing overcooking and making the eggs much easier to peel. Moreover, the rapid temperature change causes the egg to contract slightly inside the shell, helping separate the membrane from the white.
Step 6: Transfer to Ice Bath
When the timer goes off, use a slotted spoon to carefully transfer the eggs directly from the hot water into the ice bath. Let them sit in the ice water for at least 5 minutes, though 10 to 15 minutes is even better. The eggs need to cool completely before peeling. You’ll notice that hard boiled eggs cooled this way peel far more easily than those left to cool at room temperature.
Step 7: Peel and Enjoy
To peel your hard boiled eggs, gently tap each egg all over on a hard surface to create fine cracks throughout the shell. Then, roll it gently between your hands to loosen the shell. Start peeling from the wider end, where the air pocket is located. The shell should slip off easily, taking the membrane with it. If you peel the eggs under cold running water, any stubborn bits of shell will wash away effortlessly.
Storage and Make-Ahead Tips
Hard boiled eggs are excellent for meal prep because they store beautifully. Keep them in their shells in the refrigerator for up to one week. The shell acts as a natural protective barrier, keeping the eggs fresh and preventing them from absorbing odors from other foods. Store them in a covered container or a resealable bag.
If you’ve already peeled your hard boiled eggs, place them in an airtight container and refrigerate for up to five days. To prevent them from drying out, you can add a damp paper towel to the container. Alternatively, store peeled eggs in a container of cold water, changing the water daily.
For longer storage, you can freeze the yolks, though freezing whole hard boiled eggs isn’t recommended because the whites become rubbery. Separate the yolks, place them in a freezer-safe container, and freeze for up to three months. Use frozen yolks in recipes where texture isn’t critical, such as egg salad or chopped into dishes.
Planning ahead saves time during busy weeks. Cook a batch of hard boiled eggs on Sunday, and you’ll have ready-made protein for breakfasts, snacks, and lunches all week long. They’re perfect for grab-and-go mornings or for adding to salads without any extra cooking required.
Common Mistakes and How to Fix Them
One of the most frequent problems people encounter is eggs that won’t peel cleanly. This usually happens when you skip the ice bath or try to peel the eggs while they’re still warm. The solution is simple: always shock your hard boiled eggs in ice water immediately after cooking and let them cool completely before peeling.
Another common issue is the green or gray ring around the yolk. This occurs when eggs are overcooked or cooled too slowly. The discoloration is harmless but unappealing. To avoid it, follow the timing precisely and never skip the ice bath step. The rapid cooling prevents the chemical reaction that causes the discoloration.
Cracked shells during cooking are usually caused by temperature shock. If you place cold eggs directly into boiling water, the sudden temperature change can cause the shell to crack. Instead, start your eggs in cold water and bring them to a boil gradually. Alternatively, you can let refrigerated eggs sit at room temperature for 10 minutes before cooking.
Some people struggle with rubbery, tough egg whites. This results from cooking the eggs at too high a temperature for too long. Remember that hard boiled eggs don’t need to boil continuously. Removing them from heat and letting them sit in hot water produces much more tender results.
Finally, if your yolks are chalky and dry, you’ve likely overcooked them. Reduce your sitting time by one or two minutes for creamier yolks that are still fully cooked but not dry.
Variations
While traditional hard boiled eggs are perfect on their own, you can customize the cooking time to achieve different textures. For jammy yolks that are set around the edges but slightly soft in the center, reduce the sitting time to 8 minutes. These are technically between soft and hard boiled but are incredibly delicious.
You can also season the water while cooking to add subtle flavor. Try adding a tablespoon of salt to the water, which some cooks believe makes peeling easier. Others add a teaspoon of baking soda, which raises the pH of the water and can help with peeling older eggs.
For a fun twist, make marbled tea eggs by gently cracking the shells after the initial cooking, then simmering the eggs in a mixture of black tea, soy sauce, star anise, and cinnamon for an hour. The liquid seeps through the cracks, creating beautiful patterns and infusing the eggs with flavor.
Smoked hard boiled eggs are another variation worth trying. After cooking and peeling, place the eggs in a stovetop smoker with wood chips for 20 to 30 minutes. The result is eggs with a subtle smoky flavor that’s perfect for salads and appetizers.
You can also pickle your hard boiled eggs by placing peeled eggs in a jar with vinegar, water, sugar, and spices. Beet juice creates vibrant pink eggs, while turmeric gives them a golden hue. Pickled eggs keep for several weeks in the refrigerator and make excellent snacks.
Serving Suggestions
Hard boiled eggs are remarkably versatile and can be served in countless ways. The simplest approach is to sprinkle them with salt and pepper and enjoy them as a quick, protein-rich snack. Many people pack them for work lunches or post-workout fuel because they’re portable and satisfying.
Classic egg salad is one of the most popular uses for hard boiled eggs. Chop them and mix with mayonnaise, mustard, celery, and seasonings. Spread the mixture on bread for sandwiches, stuff it into tomatoes, or serve it on lettuce leaves for a low-carb option.
Deviled eggs are a party favorite that showcases hard boiled eggs beautifully. Cut them in half, remove the yolks, then mix the yolks with mayonnaise, mustard, and seasonings before piping the mixture back into the whites. You can customize the filling endlessly with additions like bacon, herbs, or hot sauce.
Add sliced hard boiled eggs to salads for extra protein and richness. They’re traditional in Cobb salad, Niçoise salad, and chef’s salad. They also work wonderfully in grain bowls, adding substance and nutrition.
For breakfast, serve hard boiled eggs alongside toast, avocado, and fresh fruit. They’re also delicious sliced and placed on top of avocado toast or mixed into breakfast burritos. In Asian cuisine, hard boiled eggs are often served with rice dishes, ramen, or congee.
You can also use hard boiled eggs in recipes that call for them as an ingredient. They’re essential for potato salad, macaroni salad, and many pasta salads. Chopped hard boiled eggs add protein to soups and stews, particularly in dishes like Filipino sinigang or Polish żurek.
Frequently Asked Questions
How do I know when hard boiled eggs are done?
The timing method described in this guide is the most reliable way to ensure your hard boiled eggs are perfectly cooked. For large eggs, 10 to 12 minutes of sitting time after boiling produces fully cooked eggs. However, you can test one egg by removing it early, running it under cold water, and cutting it open to check the yolk’s doneness.
Why are my hard boiled eggs so hard to peel?
Fresh eggs tend to be more difficult to peel than older eggs. The ice bath is crucial for easy peeling, as it causes the egg to contract away from the shell. Additionally, peeling under running water helps remove stubborn shell pieces. Starting with eggs that are at least a week old makes peeling significantly easier.
Can I make hard boiled eggs in an Instant Pot?
Yes, pressure cooking produces excellent hard boiled eggs that peel very easily. Use the 5-5-5 method: cook on high pressure for 5 minutes, let the pressure release naturally for 5 minutes, then transfer to an ice bath for 5 minutes. This method works particularly well for large batches.
What’s the difference between hard boiled eggs and soft boiled eggs?
The cooking time determines the difference. Soft boiled eggs cook for only 6 to 7 minutes total, resulting in set whites but runny or jammy yolks. Hard boiled eggs cook longer, producing completely firm yolks. Both start with the same method of eggs in cold water brought to a boil.
How can I tell if a hard boiled egg is still good?
Fresh hard boiled eggs have firm whites and yolks with no off smell. If an egg has a sulfurous or unpleasant odor when you crack it, discard it. Properly stored hard boiled eggs last up to one week in the shell or five days when peeled.
Why does my yolk have a green ring around it?
The greenish-gray ring forms when eggs are overcooked or cooled too slowly. It’s a harmless chemical reaction between sulfur and iron but indicates overcooking. Reduce your cooking time by one to two minutes and always use an ice bath to prevent this discoloration.
Can I cook hard boiled eggs from frozen?
It’s not recommended to boil eggs that are frozen solid, as the shells will likely crack. However, you can cook refrigerated eggs straight from the fridge using the cold-start method described in this guide. Let frozen eggs thaw completely in the refrigerator before cooking.
How many hard boiled eggs can I cook at once?
You can cook as many hard boiled eggs as will fit in a single layer in your pot. Just make sure there’s enough water to cover all the eggs by at least one inch. The cooking time remains the same regardless of the number of eggs, as long as they’re in a single layer.
Making perfect hard boiled eggs is a fundamental kitchen skill that pays dividends throughout your cooking life. Once you master this simple technique, you’ll have a reliable source of affordable, healthy protein ready whenever you need it. The method takes just minutes of active work, and the results are consistently excellent. Whether you’re meal prepping for the week, making egg salad for a picnic, or simply wanting a nutritious snack, hard boiled eggs prepared this way will never disappoint. Start with good quality eggs, follow the timing carefully, and don’t skip that ice bath. You’ll be rewarded with eggs that peel beautifully and taste absolutely perfect every single time.