
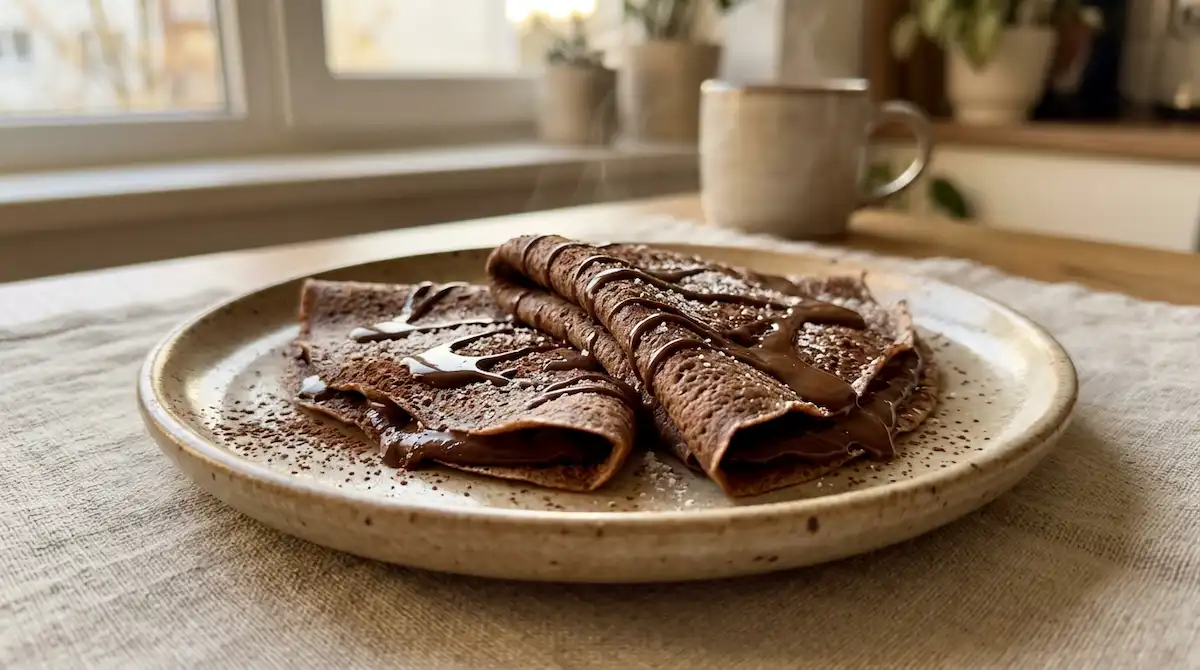
How to Make Perfect Chocolate Crepes in 4 Simple Steps
Have you ever wanted to create those impossibly thin, delicate French crepes with rich chocolate flavor that taste like they came from a Parisian café? Chocolate Crepes transform simple pantry ingredients into an elegant treat that works equally well for a luxurious breakfast, romantic brunch, or impressive dessert. Moreover, they’re surprisingly easy to master once you understand the basic technique. Therefore, whether you’re planning a special occasion meal or simply treating yourself on a weekend morning, this recipe will guide you through every detail. Let me show you exactly how to achieve paper-thin, tender crepes with beautiful chocolate flavor every single time.
Table of Contents
What Is Chocolate Crepes
Chocolate Crepes are ultra-thin French pancakes infused with cocoa powder, creating a delicate, lacy texture with rich chocolate flavor throughout. Unlike thick American pancakes or even regular crepes, these incorporate unsweetened cocoa powder directly into the batter, which gives them a beautiful dark color and deep chocolate taste without making them overly sweet.
The word “crepe” comes from the Latin “crispa,” meaning “curled,” which perfectly describes how these thin pancakes naturally curl slightly at the edges as they cook. Traditional crepes originated in Brittany, France, where they’ve been a staple for centuries. However, the chocolate variation adds a modern twist that makes them even more versatile and appealing.
These crepes differ fundamentally from regular pancakes in both texture and technique. The batter contains more liquid and less flour, creating an incredibly thin pancake that you can almost see through when held up to light. Furthermore, the cooking method involves swirling the batter in a hot pan to create that signature paper-thin consistency.
Chocolate Crepes walk the line between breakfast and dessert beautifully. Fill them with sweet ingredients like whipped cream, berries, or Nutella for dessert, or enjoy them simply dusted with powdered sugar for a special breakfast. The chocolate flavor is present but not overwhelming, which makes them incredibly versatile for different fillings and toppings.
Why You Will Love This Chocolate Crepes
First and foremost, these crepes taste absolutely divine. The subtle chocolate flavor throughout the crepe itself means every bite delivers that cocoa richness, not just the filling. Meanwhile, the texture is impossibly tender and delicate, creating a melt-in-your-mouth experience that regular pancakes simply cannot match.
The elegance factor makes Chocolate Crepes special for entertaining. They look impressive and sophisticated on a plate, yet they come together with basic ingredients you probably already have. As a result, you can create a restaurant-quality dish at home without spending hours in the kitchen or shopping for exotic ingredients.
Another compelling reason to love this recipe is its incredible versatility. You can fill Chocolate Crepes with virtually anything fresh fruit and cream for breakfast, ice cream and chocolate sauce for dessert, or even savory fillings if you reduce the sugar slightly. Therefore, mastering this one recipe opens up endless meal possibilities.
The make-ahead convenience is another major advantage. You can prepare the batter the night before, or cook all the crepes in advance and simply rehab them when needed. This flexibility makes them perfect for stress-free entertaining or busy mornings when you want something special without the hassle.
Finally, making crepes is genuinely fun and satisfying. Once you master the swirling technique, you’ll feel like a professional chef. Moreover, they cook quickly, so you can produce a stack of beautiful crepes in less than 30 minutes total.
Ingredients
Creating perfect Chocolate Crepes requires simple ingredients, but the ratios matter significantly. The key is achieving the right liquid-to-flour balance for that signature thin, delicate texture.
Main Ingredients
| Ingredient | Amount | Notes |
|---|---|---|
| All-purpose flour | 1 cup | Spoon and level for accuracy |
| Unsweetened cocoa powder | 3 tablespoons | Dutch-process creates deeper flavor |
| Granulated sugar | 2 tablespoons | Adjust based on filling sweetness |
| Salt | ¼ teaspoon | Enhances chocolate flavor |
| Large eggs | 3 | Room temperature blends smoother |
| Whole milk | 1½ cups | Low-fat works but whole is richer |
| Butter | 3 tablespoons | Melted and slightly cooled |
| Vanilla extract | 1 teaspoon | Pure vanilla tastes best |
| Butter for cooking | As needed | For greasing the pan between crepes |
The cocoa powder is what transforms regular crepes into Chocolate Crepes, so quality matters here. Dutch-process cocoa creates a smoother, less acidic chocolate flavor, though natural cocoa powder works perfectly fine. Meanwhile, the melted butter adds richness and helps create tender crepes that don’t stick or tear.
The ratio of liquid to flour is crucial this batter should be much thinner than pancake batter, closer to the consistency of heavy cream. This thinness allows you to swirl it into those characteristically delicate crepes.
How to Make Chocolate Crepes Step by Step
Making these crepes involves two main phases: preparing the batter and cooking the crepes. The batter comes together in minutes, while the cooking requires a bit of practice to perfect your technique.
Step 1: Blend the Batter
Combine the flour, cocoa powder, sugar, and salt in a blender. Add the eggs, milk, melted butter, and vanilla extract. Blend on medium speed for 30 to 45 seconds until the batter becomes completely smooth with no lumps remaining. Alternatively, you can whisk everything together in a bowl, though a blender creates the silkiest texture. The finished batter should look thin and pourable, similar to heavy cream. Let the batter rest for at least 15 minutes at room temperature, or cover and refrigerate it for up to 24 hours. This resting time allows the flour to fully hydrate and produces more tender Chocolate Crepes with better texture.
Step 2: Heat Your Pan Properly
Place an 8-inch or 10-inch nonstick skillet or crepe pan over medium heat. Let it heat for about 2 minutes until a drop of water sizzles immediately when it hits the surface. Add about ½ teaspoon of butter and swirl it around to coat the entire bottom of the pan. The pan temperature is critical too hot and the crepes will cook before you can swirl them thin; too cool and they’ll be thick and rubbery. Medium heat works best for most stovetops, though you may need to adjust slightly based on your particular pan and burner.
Step 3: Pour and Swirl the Batter
Remove the pan from the heat briefly and pour about ¼ cup of batter into the center. Immediately lift the pan and tilt it in a circular motion, swirling the batter to cover the entire bottom in a thin, even layer. This swirling motion should take only 2 to 3 seconds work quickly before the batter sets. Return the pan to the heat and cook for 60 to 90 seconds until the edges start to look dry and slightly curl away from the pan. The top surface should look set rather than wet. Use a thin spatula to gently lift one edge, then quickly flip the crepe over. Cook the second side for just 30 to 45 seconds until lightly set. The first crepe often doesn’t turn out perfect as you’re calibrating temperature and technique, so don’t worry if it looks imperfect.
Step 4: Stack and Repeat
Slide the finished crepe onto a plate and continue with the remaining batter, adding a small amount of butter to the pan every 2 to 3 crepes. Stack the finished Chocolate Crepes directly on top of each other they won’t stick together. You should get approximately 10 to 12 crepes from this recipe, depending on the size of your pan and how thin you make them. The process becomes easier and faster as you develop a rhythm and your pan maintains consistent temperature.
Storage and Make-Ahead Tips
Proper storage keeps these crepes fresh and pliable for several days. Because they’re so thin, Chocolate Crepes actually store better than thicker pancakes and reheat beautifully.
Store cooled crepes stacked together with parchment paper between each layer if you prefer, though they typically don’t stick together. Wrap the entire stack tightly in plastic wrap or place them in an airtight container. They’ll keep in the refrigerator for up to 5 days. The chocolate flavor actually develops and deepens slightly after a day, making them taste even better.
For longer storage, freeze the crepes with parchment paper between each one, then wrap the stack tightly in plastic wrap and aluminum foil. Frozen Chocolate Crepes keep for up to 2 months. Thaw them overnight in the refrigerator, or let them sit at room temperature for about 30 minutes before using.
To reheat refrigerated crepes, warm them individually in a dry skillet over low heat for about 15 seconds per side. Alternatively, stack several together, wrap them in foil, and warm them in a 300°F oven for 10 minutes. Microwave reheating works in a pinch place a damp paper towel over the stack and heat for 20 to 30 seconds though this method can make them slightly rubbery.
The batter itself also stores beautifully. Prepare it up to 24 hours in advance and refrigerate it covered. In fact, overnight refrigeration improves the texture because the flour hydrates more completely. Just give the batter a good stir before using, as some separation is normal.
Common Mistakes and How to Fix Them
Even though Chocolate Crepes are straightforward, several common issues can affect your results. Fortunately, each problem has a simple solution once you understand the cause.
Thick, rubbery crepes result from batter that’s too thick or not swirling fast enough. The batter should be quite thin—if it seems too thick, add milk one tablespoon at a time until it reaches heavy cream consistency. Furthermore, you must swirl immediately after pouring, before the batter has time to set on the hot pan.
Crepes sticking or tearing happens when the pan isn’t properly greased or when you try to flip too early. Make sure to add a small amount of butter to the pan every few crepes, and wait until the edges clearly lift away from the pan before attempting to flip. Additionally, using a high-quality nonstick pan makes an enormous difference.
Lumpy batter creates crepes with an uneven texture. Always blend or whisk thoroughly until completely smooth, and let the batter rest before cooking. If you notice lumps after resting, blend or whisk again briefly. Sifting the cocoa powder before adding it helps prevent cocoa lumps specifically.
First crepe disaster is almost universal don’t let it discourage you. The first crepe calibrates your pan temperature and technique. If it’s terrible, simply discard it and continue. Consider it a “test crepe” rather than a failure. By the third or fourth crepe, you’ll find your rhythm.
Crepes browning too quickly means your pan is too hot. Reduce the heat slightly and let the pan cool for 30 seconds before continuing. Chocolate Crepes should be dark brown from the cocoa, not from burning, so watch carefully and adjust your temperature as needed.
Variations
The basic Chocolate Crepes recipe is delicious, but these variations add different flavors and adapt the recipe for dietary needs or preferences.
Double Chocolate Crepes increase the cocoa powder to ⅓ cup for intense chocolate lovers. Add ¼ cup of mini chocolate chips to the batter just before cooking each crepe. The chips melt slightly during cooking, creating pockets of melted chocolate throughout. This variation is pure indulgence.
Orange Chocolate Crepes add 1 teaspoon of orange zest and ½ teaspoon of orange extract to the batter. The citrus brightens the chocolate flavor and creates a sophisticated taste reminiscent of chocolate oranges. Serve these with whipped cream and candied orange peel for an elegant dessert.
Mocha Crepes incorporate 1 tablespoon of instant espresso powder dissolved in the warm milk before adding it to the batter. The coffee enhances the chocolate flavor significantly and adds complexity. These are perfect for brunch or as an after-dinner treat with coffee-flavored filling.
Gluten-Free Chocolate Crepes replace the all-purpose flour with a gluten-free flour blend designed for baking. Make sure it contains xanthan gum or add ¼ teaspoon separately. The texture will be slightly different but still delicious. Let the batter rest for 30 minutes rather than 15 to allow the alternative flour to hydrate properly.
Vegan Chocolate Crepes replace the eggs with ¾ cup of unsweetened applesauce or 3 tablespoons of ground flaxseed mixed with 9 tablespoons of water (let sit for 5 minutes to gel). Use plant-based milk and replace the butter with coconut oil. The texture differs slightly but remains tender and delicious.
Mexican Chocolate Crepes add ½ teaspoon of cinnamon and a tiny pinch of cayenne pepper to the batter. This creates warmth and complexity that pairs beautifully with dulce de leche or caramel fillings.
Serving Suggestions
Chocolate Crepes shine with countless filling and topping combinations. The chocolate base pairs beautifully with both sweet and fruity flavors.
For a classic French presentation, fill the crepes with sweetened whipped cream and fresh berries, then fold them into triangles. Dust with powdered sugar and serve immediately. This simple preparation lets the crepe flavor shine while adding freshness and lightness from the fruit.
Create an indulgent dessert by spreading Chocolate Crepes with Nutella or chocolate hazelnut spread, adding sliced bananas, rolling them up, and topping with vanilla ice cream and chocolate sauce. This combination is irresistible and tastes like something from an upscale restaurant.
For breakfast or brunch, fill the crepes with mascarpone cheese mixed with a bit of honey and vanilla, add fresh strawberries, and fold into quarters. Serve with maple syrup on the side. The creamy filling balances the chocolate beautifully.
Make a stunning crepe cake by stacking Chocolate Crepes with layers of whipped cream, pastry cream, or chocolate mousse between each one. Stack 15 to 20 crepes for an impressive tower, then refrigerate for at least 2 hours before slicing. Each slice reveals beautiful layers that wow guests.
For a simpler approach, serve the crepes warm with just a dusting of powdered sugar, a drizzle of honey, and a squeeze of fresh lemon juice. Sometimes the simplest presentations are the most satisfying.
Frequently Asked Questions
Can I make Chocolate Crepes without a blender?
Absolutely. Whisk the dry ingredients together in a bowl, then make a well in the center. Add the eggs and whisk until combined, then gradually add the milk while whisking constantly. Add the melted butter and vanilla last. Whisk vigorously for about a minute until the batter becomes completely smooth. The result will be just as good, though it requires a bit more elbow grease.
Why do my Chocolate Crepes tear when I flip them?
Tearing usually happens because you’re flipping too early, before the crepe has set properly, or because the batter is too thin. Wait until the edges clearly curl away from the pan and the surface looks completely dry before flipping. Additionally, make sure your batter has the right consistency thin but not watery.
Can I use a regular frying pan instead of a crepe pan?
Yes, any nonstick skillet works perfectly fine for making Chocolate Crepes. An 8-inch or 10-inch pan works best because it creates manageable-sized crepes. The key is having a flat bottom and good nonstick surface. Cast iron can work if it’s well-seasoned, though nonstick is easier for beginners.
How do I know when to flip the crepe?
Look for visual cues: the edges will start to curl slightly away from the pan, the surface will look dry rather than wet, and the bottom will have light golden-brown spots. This usually takes 60 to 90 seconds on the first side. The second side cooks much faster, only 30 to 45 seconds.
Can I make the batter ahead of time?
Definitely. In fact, resting the batter for several hours or overnight improves the texture significantly. The flour hydrates more completely, resulting in more tender Chocolate Crepes. Store the batter covered in the refrigerator for up to 24 hours. Stir it well before using, as separation is normal.
What’s the best filling for Chocolate Crepes?
This depends entirely on personal preference and the occasion. For breakfast, try ricotta mixed with honey and lemon zest. For dessert, whipped cream with fresh berries, Nutella with bananas, or chocolate mousse all work beautifully. The chocolate crepes themselves are mildly sweet, so they pair well with both very sweet and more subtle fillings.
Why is my first crepe always terrible?
The first crepe serves as a “calibration crepe” that helps you gauge pan temperature and perfect your swirling technique. The pan is also still establishing its temperature. Almost everyone’s first crepe fails, so just accept it, learn from it, and move on to the next one.
Can I freeze filled crepes?
While you can freeze the crepes themselves beautifully, I don’t recommend freezing them already filled. The fillings often release moisture during thawing, making the crepes soggy. Instead, freeze the crepes unfilled, then thaw and fill them fresh for the best texture and flavor.
Now you have everything you need to create ethereal, delicious Chocolate Crepes that rival anything you’d find in a French café. These delicate, cocoa-infused crepes prove that impressive doesn’t have to mean complicated. The simple technique, basic ingredients, and endless versatility make them perfect for both everyday indulgence and special occasions. Master this recipe once, and you’ll find yourself making Chocolate Crepes again and again for lazy Sunday breakfasts, elegant dinner parties, and every celebration in between. Start practicing this weekend, and soon you’ll be swirling batter like a pro, creating stacks of beautiful crepes that taste as amazing as they look.