
How to Make Perfect Red Velvet Pancakes in 5 Easy Steps
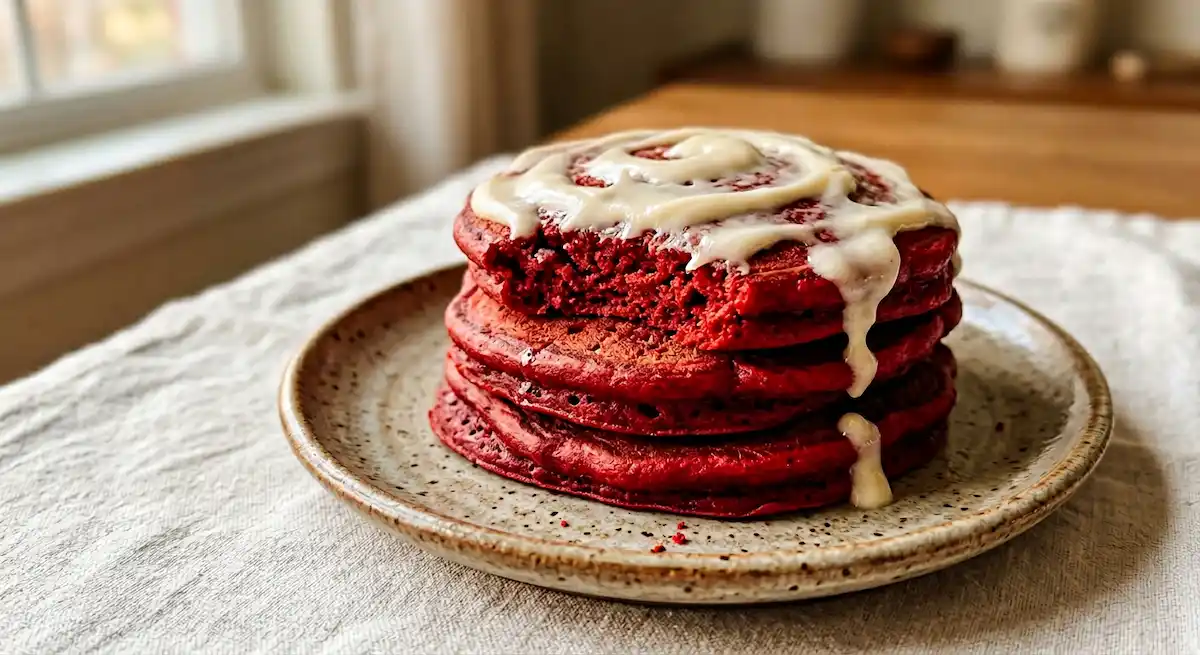
Imagine serving a stack of vibrant crimson pancakes that taste like red velvet cake but work perfectly for breakfast. Red Velvet Pancakes combine the beloved flavors of the classic Southern dessert with the comfort of fluffy morning pancakes, creating something truly special for weekend brunches or celebration breakfasts. Moreover, they’re surprisingly simple to make with just a few extra ingredients added to your basic pancake routine. Therefore, whether you’re planning a Valentine’s Day breakfast, birthday morning surprise, or simply want to elevate your usual pancake game, this recipe delivers both visual drama and incredible taste. Let me show you exactly how to create these show-stopping pancakes that taste as amazing as they look.
Table of Contents
What Is Red Velvet Pancakes
Red Velvet Pancakes are fluffy buttermilk pancakes infused with cocoa powder and red food coloring, topped with a sweet cream cheese glaze that mimics the iconic frosting from red velvet cake. Unlike regular chocolate pancakes, these contain just a hint of cocoa enough to create that signature mild chocolate flavor without overpowering the buttery pancake base.
The concept borrows directly from red velvet cake, which originated in the American South during the 1800s. Traditional red velvet cake gets its distinctive color from a chemical reaction between acidic ingredients and natural cocoa, though modern recipes rely on red food coloring for that vibrant hue. Similarly, Red Velvet Pancakes use food coloring to achieve their striking appearance while maintaining the subtle cocoa undertones.
These pancakes occupy a sweet spot between regular breakfast pancakes and dessert. The cocoa content is minimal compared to chocolate pancakes, creating a delicate flavor that works beautifully in the morning. Furthermore, the tangy cream cheese topping provides the perfect contrast to the slightly sweet pancakes, just like traditional red velvet cake and cream cheese frosting.
The texture remains light and fluffy despite the added ingredients. Buttermilk ensures tenderness and adds the slight tang that’s characteristic of authentic red velvet flavor. As a result, you get pancakes that are special enough for celebrations but not so heavy or sweet that they feel inappropriate for breakfast.
Why You Will Love This Red Velvet Pancakes
First and foremost, these pancakes make any breakfast feel like a celebration. The stunning red color immediately signals that this isn’t an ordinary morning, making them perfect for holidays, birthdays, or when you simply want to create a memorable breakfast experience. Moreover, the visual impact requires minimal effort just a few drops of food coloring transform ordinary batter into something spectacular.
The flavor profile sets Red Velvet Pancakes apart from both regular and chocolate pancakes. You get subtle cocoa notes, slight tanginess from the buttermilk, and that signature red velvet taste that’s somehow both familiar and unique. Meanwhile, the cream cheese glaze ties everything together with its sweet, tangy richness that melts into the warm pancakes.
Another compelling reason to love this recipe is how easy it is to make. If you can make regular pancakes, you can absolutely make these. The process involves simply mixing a few extra ingredients into standard pancake batter. Therefore, you don’t need special equipment, unusual ingredients, or advanced cooking skills to create impressive results.
These pancakes also work beautifully for entertaining. They’re conversation starters that make guests feel special and cared for. Furthermore, you can prepare the batter and glaze ahead of time, making morning execution stress-free even when feeding a crowd.
Finally, Red Velvet Pancakes satisfy multiple cravings at once. They’re breakfast and dessert rolled into one, sweet but not overly so, indulgent yet still appropriate for morning meals. This versatility means they work for various occasions throughout the year.
Ingredients
Creating perfect Red Velvet Pancakes requires standard pancake ingredients plus a few special additions that create that signature flavor and color. Quality matters here, especially for the cocoa powder and food coloring.
Pancake Ingredients
| Ingredient | Amount | Notes |
|---|---|---|
| All-purpose flour | 2 cups | Spoon and level for accuracy |
| Granulated sugar | 3 tablespoons | Adds mild sweetness |
| Unsweetened cocoa powder | 2 tablespoons | Use quality cocoa for best flavor |
| Baking powder | 2 teaspoons | Must be fresh for proper rise |
| Baking soda | ½ teaspoon | Reacts with buttermilk |
| Salt | ½ teaspoon | Enhances all flavors |
| Buttermilk | 2 cups | Room temperature works best |
| Large eggs | 2 | Room temperature blends smoother |
| Unsalted butter | 4 tablespoons | Melted and slightly cooled |
| Vanilla extract | 2 teaspoons | Pure vanilla tastes best |
| Red food coloring | 2 tablespoons | Gel color works better than liquid |
Cream Cheese Glaze
| Ingredient | Amount | Notes |
|---|---|---|
| Cream cheese | 4 ounces | Softened to room temperature |
| Powdered sugar | 1 cup | Sifted for smooth glaze |
| Milk | 2-3 tablespoons | Adjust for desired consistency |
| Vanilla extract | ½ teaspoon | Enhances the cream cheese flavor |
The buttermilk is essential for authentic Red Velvet Pancakes because it provides both tenderness and the slight tanginess that defines red velvet flavor. Meanwhile, the small amount of cocoa powder adds depth without turning these into chocolate pancakes. The red food coloring creates that signature vibrant color gel food coloring produces more intense color with less product, though liquid works fine if that’s what you have.
How to Make Red Velvet Pancakes Step by Step
Making these pancakes follows a straightforward process that ensures fluffy, tender results every time. The key is not overmixing the batter and cooking at the right temperature.
Step 1: Prepare the Cream Cheese Glaze
Start by making the glaze so it’s ready when your pancakes come off the griddle. Beat the softened cream cheese in a medium bowl with an electric mixer until smooth and fluffy, about 1 minute. Add the powdered sugar and vanilla extract, then beat on low speed until combined. Gradually add milk one tablespoon at a time, beating after each addition, until the glaze reaches a pourable but still thick consistency. It should drizzle off a spoon but not be runny. Set the glaze aside at room temperature while you make the pancakes. If it thickens too much while sitting, simply stir in a few drops of milk to loosen it.
Step 2: Mix the Dry Ingredients
Whisk together the flour, sugar, cocoa powder, baking powder, baking soda, and salt in a large bowl until everything is evenly distributed. Make sure to break up any cocoa lumps by pressing them against the side of the bowl with your whisk. This thorough mixing ensures that the leavening agents distribute evenly throughout the batter, which creates uniformly fluffy Red Velvet Pancakes. Set this bowl aside while you prepare the wet ingredients.
Step 3: Combine the Wet Ingredients
In a separate bowl, whisk together the buttermilk, eggs, melted butter, vanilla extract, and red food coloring until completely combined. The mixture should turn a vibrant red color if it’s not as bright as you’d like, add another tablespoon of food coloring. Whisk vigorously for about 30 seconds to ensure the eggs are fully incorporated and the color is evenly distributed throughout the liquid.
Step 4: Combine Wet and Dry Ingredients
Pour the wet ingredients into the bowl with the dry ingredients. Gently fold everything together using a spatula or wooden spoon, stirring just until the flour disappears. The batter should look slightly lumpy with a few small flour streaks remaining this is perfect. Overmixing develops gluten, which creates tough, rubbery pancakes instead of tender, fluffy ones. Let the batter rest for 5 minutes while you heat your griddle. During this time, the flour hydrates and the leavening agents activate, which improves the texture significantly.
Step 5: Cook the Pancakes
Heat a griddle or large nonstick skillet over medium heat. Lightly grease it with butter or cooking spray. Test the temperature by dropping a small amount of water on the surface it should sizzle immediately. Pour ¼ cup of batter onto the griddle for each pancake, spacing them about 2 inches apart. Cook until bubbles form across the entire surface and the edges look set, about 2 to 3 minutes. Flip the pancakes carefully and cook for another 1 to 2 minutes until the second side turns golden brown. The Red Velvet Pancakes should feel springy when gently pressed. Transfer to a plate and continue with the remaining batter, adjusting heat as needed to prevent burning.
Storage and Make-Ahead Tips
Proper storage keeps these pancakes delicious for several days, making them perfect for meal prep or managing leftovers from a big batch.
Store leftover Red Velvet Pancakes in an airtight container in the refrigerator for up to 4 days. Layer them with parchment paper between each pancake to prevent sticking. When ready to eat, reheat them in a toaster, toaster oven, or microwave. The toaster method works best because it maintains texture just toast on a medium setting until heated through. Alternatively, microwave them for 20 to 30 seconds until warm.
For longer storage, freeze the cooled pancakes in a single layer on a baking sheet until solid, then transfer them to a freezer bag with parchment paper between each pancake. They’ll keep for up to 2 months. Reheat frozen pancakes directly in the toaster or microwave without thawing first. This makes weekday breakfasts incredibly easy just pop one in the toaster for a special morning treat.
The pancake batter itself can be prepared the night before and stored covered in the refrigerator. However, the baking powder and baking soda lose some potency after sitting, so pancakes made from overnight batter may be slightly less fluffy. If you choose this method, give the batter a gentle stir before cooking and expect slightly denser pancakes.
The cream cheese glaze stores beautifully in an airtight container in the refrigerator for up to 1 week. Bring it to room temperature and stir well before using. If it’s too thick, add a teaspoon of milk and stir until smooth. You can make this glaze several days ahead, which simplifies morning preparation significantly.
Common Mistakes and How to Fix Them
Even though Red Velvet Pancakes are straightforward, several common issues can affect your results. Fortunately, each problem has a simple solution.
Overmixing the batter creates the most frequent problem. Mix just until the flour disappears and the batter looks lumpy. Those lumps disappear during cooking, producing tender pancakes. Smooth batter means you’ve overmixed, which develops gluten and creates tough, rubbery pancakes instead of fluffy ones. Stop mixing earlier than feels natural.
Cooking at too high heat causes the outsides to burn before the insides cook through. Medium heat works best for Red Velvet Pancakes. If your first pancake browns too quickly or burns, reduce the heat and let the pan cool slightly before continuing. Patience creates evenly cooked pancakes with golden exteriors and fluffy interiors.
Flipping too early or too late affects texture and appearance. Wait until bubbles cover the entire surface and the edges look dry and set before flipping. This usually takes 2 to 3 minutes. If you flip too soon, the pancakes may fall apart. If you wait too long, they become dry and tough.
Using expired leavening agents produces flat, dense pancakes. Baking powder and baking soda lose effectiveness over time. Test your baking powder by adding a teaspoon to hot water it should fizz vigorously. If it doesn’t, buy fresh. This simple check prevents disappointing results.
Skipping the resting time may seem insignificant, but those 5 minutes improve texture noticeably. The flour hydrates fully, the gluten relaxes, and the leavening agents activate. Therefore, always let your batter rest before cooking for the fluffiest possible Red Velvet Pancakes.
Variations
The basic Red Velvet Pancakes recipe is delicious, but these variations add different flavors and adapt the recipe for various preferences.
Chocolate Chip Red Velvet Pancakes fold ½ cup of mini chocolate chips into the batter just before cooking. The chocolate chips melt slightly during cooking, creating pockets of melted chocolate throughout. This variation amplifies the dessert-like quality while maintaining breakfast appropriateness.
Red Velvet Protein Pancakes replace ½ cup of the flour with vanilla or chocolate protein powder. Reduce the sugar to 2 tablespoons to compensate for sweetened protein powder. These provide extra protein for post-workout breakfasts while maintaining the signature red velvet flavor.
Dairy-Free Red Velvet Pancakes substitute the buttermilk with dairy-free milk mixed with 2 tablespoons of lemon juice or vinegar (let sit 5 minutes). Use coconut oil instead of butter and replace the cream cheese glaze with coconut whipped cream mixed with powdered sugar and a touch of vanilla.
Red Velvet Pancake Bites use a mini pancake pan or spoon small amounts of batter onto the griddle to create silver-dollar-sized pancakes. These bite-sized versions are perfect for brunch parties, kids’ breakfasts, or serving as appetizers at breakfast gatherings.
Whole Wheat Red Velvet Pancakes replace half the all-purpose flour with whole wheat flour for added fiber and nutrients. The texture becomes slightly denser and nuttier, but the red velvet flavor remains delicious. You may need to add 1 to 2 tablespoons more buttermilk to compensate for whole wheat’s higher absorption.
Red Velvet Waffles use the same batter in a waffle iron instead of a griddle. The crispy exterior and fluffy interior of waffles work beautifully with this flavor profile. Cook according to your waffle iron’s instructions, and serve with the cream cheese glaze drizzled over the top.
Serving Suggestions
Red Velvet Pancakes shine with thoughtful presentation and complementary toppings that enhance their special nature.
The classic presentation involves stacking 3 to 4 pancakes high, drizzling generously with the cream cheese glaze, and adding a light dusting of cocoa powder on top. Fresh berries on the side add color contrast and freshness that balances the richness. Strawberries and raspberries work particularly well because their red color complements the pancakes.
For an indulgent dessert-style breakfast, top the Red Velvet Pancakes with vanilla ice cream, extra cream cheese glaze, and chocolate shavings. This over-the-top presentation turns breakfast into a special occasion celebration that everyone will remember.
Create a breakfast board by serving the pancakes alongside crispy bacon, scrambled eggs, and fresh fruit. The savory elements balance the sweetness and transform the meal into a complete brunch spread. This approach works especially well for Valentine’s Day or Mother’s Day breakfasts.
For individual servings, plate 2 to 3 pancakes per person, drizzle with glaze, and garnish with a single fresh strawberry and a mint leaf. This elegant presentation elevates the dish for special occasions while keeping portions reasonable.
Kids love these pancakes with the glaze served on the side for dipping. Cut the pancakes into strips or quarters, arrange them on a plate, and provide a small bowl of cream cheese glaze for dunking. This interactive approach makes breakfast fun and helps manage how much glaze each child eats.
Frequently Asked Questions
Can I make Red Velvet Pancakes without food coloring?
Yes, though they won’t have that signature vibrant red color. The pancakes will taste the same—like mild chocolate pancakes with the characteristic red velvet flavor from the cocoa and buttermilk combination. Some people prefer this approach to avoid artificial colors, and the result is still delicious, just brown rather than red.
Why are my Red Velvet Pancakes not fluffy?
Dense pancakes usually result from overmixing the batter, expired leavening agents, or cooking at too low a temperature. Make sure your baking powder and baking soda are fresh, mix the batter just until combined, and cook on medium heat. Additionally, letting the batter rest for 5 minutes before cooking helps create fluffier texture.
Can I use regular milk instead of buttermilk?
While you can substitute regular milk mixed with 2 tablespoons of lemon juice or vinegar, buttermilk really is important for authentic Red Velvet Pancakes. It provides the tangy flavor that’s characteristic of red velvet and reacts with the baking soda to create extra fluffiness. The substitute works in a pinch but doesn’t taste quite the same.
How do I prevent the red color from looking pink instead of vibrant red?
Use gel food coloring rather than liquid for more intense color with less product. Start with 2 tablespoons and add more if needed. Additionally, make sure to mix the color thoroughly into the wet ingredients before combining with the dry ingredients. The cocoa powder can dull the color slightly, so don’t be shy with the food coloring.
Can I make the batter ahead of time?
You can prepare it the night before and refrigerate it, though the pancakes may be slightly less fluffy because the leavening agents lose some potency. For best results, mix the dry ingredients and wet ingredients separately the night before, then combine them just before cooking. This gives you convenience without sacrificing texture.
What can I use instead of cream cheese glaze?
Maple syrup works beautifully with Red Velvet Pancakes, as does whipped cream, vanilla yogurt, or even a simple powdered sugar glaze made with milk. However, the cream cheese glaze is what really makes these taste like red velvet cake, so I highly recommend it for the full experience.
Are Red Velvet Pancakes appropriate for kids?
Absolutely. The cocoa content is minimal, so they’re not significantly more caffeinated than regular pancakes. The food coloring is the same used in countless other foods kids eat regularly. Moreover, most children love the fun red color and sweet cream cheese topping, making these a hit for birthday breakfasts or special occasions.
Can I make these gluten-free?
Yes, substitute the all-purpose flour with a gluten-free flour blend designed for baking. Look for one that contains xanthan gum or add ¼ teaspoon separately. The texture will be slightly different but still delicious. Let the batter rest for 10 minutes rather than 5 to allow the gluten-free flour to hydrate properly.
Now you have everything you need to create stunning, delicious Red Velvet Pancakes that transform ordinary breakfasts into special occasions. These vibrant, fluffy pancakes prove that breakfast can be both beautiful and easy to make. The combination of mild chocolate flavor, tangy buttermilk, and sweet cream cheese glaze creates something truly memorable that works for holidays, celebrations, or any morning you want to feel special. Master this recipe once, and it will become your go-to for every breakfast celebration throughout the year. Make a batch this weekend and watch everyone’s faces light up when you bring these gorgeous red pancakes to the table.