
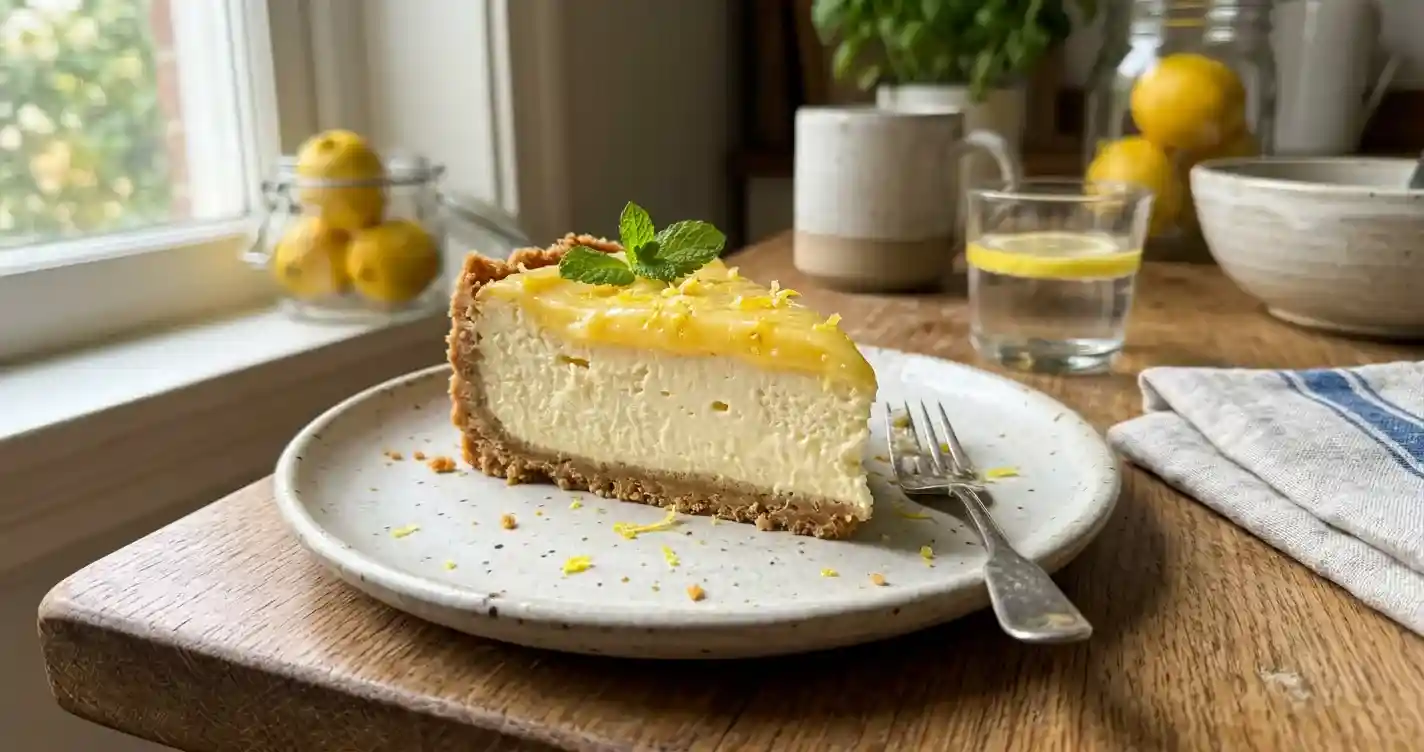
How to Make the Best Lemon Cheesecake in 5 Simple Steps
Have you ever sliced into a cheesecake and marveled at its perfectly smooth, crack-free surface and silky texture? Lemon Cheesecake combines the rich, creamy indulgence of classic cheesecake with bright, refreshing citrus that cuts through the richness and creates a dessert that tastes both luxurious and light.
This stunning dessert impresses guests at dinner parties while being surprisingly forgiving to make once you understand the key techniques. Moreover, the tangy lemon flavor makes it perfect for spring and summer celebrations, though its universal appeal works year-round whenever you want something special.
In this comprehensive guide, I’ll walk you through every detail of creating bakery-quality Lemon Cheesecake in your own kitchen, from achieving the perfect creamy texture to preventing cracks and incorporating just the right amount of lemon flavor.
Table of Contents
What is Lemon Cheesecake
Lemon Cheesecake is a baked dessert featuring a graham cracker crust filled with a creamy mixture of cream cheese, eggs, sugar, and fresh lemon juice and zest, then baked in a water bath until set. The citrus element distinguishes it from plain cheesecake by adding brightness and complexity that balances the rich dairy base.
The dessert originated as a variation on traditional New York-style cheesecake, with bakers discovering that lemon’s acidity complements cream cheese’s tangy richness perfectly. The combination creates a more nuanced flavor profile than either element alone could achieve.
The texture of properly made Lemon Cheesecake should be dense yet creamy, similar to custard but firmer and more substantial. When you drag your fork through a slice, it should cut cleanly without being crumbly or wet. The filling holds its shape on the plate while still feeling luxuriously smooth on your tongue.
The lemon flavor can range from subtle to pronounced depending on how much juice and zest you incorporate. Traditional versions use enough lemon to taste clearly without overwhelming the cream cheese base, creating harmony rather than letting one flavor dominate.
Most Lemon Cheesecake recipes employ a water bath during baking, which provides gentle, even heat that prevents cracking and ensures creamy texture throughout. This technique transforms cheesecake from finicky to foolproof when executed properly.
Why You Will Love This Lemon Cheesecake
First and foremost, Lemon Cheesecake delivers impressive visual and taste impact with techniques that anyone can master. The elegant appearance suggests hours of difficult work, yet the actual process involves straightforward steps that require more patience than skill.
The bright lemon flavor makes this dessert feel lighter and more refreshing than traditional cheesecake. The citrus cuts through the richness, preventing that overly full feeling that sometimes follows rich desserts. You can enjoy a generous slice without feeling weighed down afterward.
The make-ahead friendly nature simplifies entertaining significantly. You must refrigerate Lemon Cheesecake for several hours before serving anyway, so making it the day before your event actually improves the texture and flavor. This advance preparation eliminates last-minute stress when you’re hosting.
The versatility for different occasions makes this recipe valuable year-round. Serve it at Easter brunch, summer barbecues, birthday celebrations, or elegant dinner parties. The sophisticated flavor appeals to adults while remaining accessible enough that most children enjoy it too.
Lemon Cheesecake also happens to be surprisingly stable and transportable compared to other delicate desserts. Once fully chilled and set, it travels well to potlucks or picnics. The firm texture doesn’t collapse or slide like some other desserts might during transport.
The recipe scales beautifully whether you’re making a small six-inch cheesecake for intimate gatherings or a large ten-inch showstopper for major celebrations. The proportions and techniques remain consistent regardless of size.
Finally, the leftovers store exceptionally well. Properly wrapped Lemon Cheesecake maintains its quality in the refrigerator for up to five days, and it actually tastes better on day two or three as the flavors continue developing.
Ingredients
For the Crust
| Ingredient | Amount | Notes |
|---|---|---|
| Graham cracker crumbs | 1 1/2 cups | About 10-12 full crackers, finely crushed |
| Granulated sugar | 3 tablespoons | Balances the crust’s flavor |
| Unsalted butter | 6 tablespoons | Melted, binds the crumbs |
| Salt | Pinch | Enhances all other flavors |
For the Filling
| Ingredient | Amount | Notes |
|---|---|---|
| Cream cheese | 32 oz (4 packages) | Room temperature is crucial |
| Granulated sugar | 1 1/4 cups | Adjust for desired sweetness |
| All-purpose flour | 3 tablespoons | Stabilizes the filling |
| Large eggs | 4 | Room temperature prevents curdling |
| Sour cream | 1/3 cup | Adds tang and creaminess |
| Fresh lemon juice | 1/3 cup | About 2-3 lemons |
| Lemon zest | 2 tablespoons | Packed, from 2-3 lemons |
| Vanilla extract | 1 teaspoon | Rounds out the flavor |
Optional Topping
| Ingredient | Amount | Notes |
|---|---|---|
| Lemon curd | 1/2 cup | Store-bought or homemade |
| Whipped cream | 1 cup | Sweetened, for serving |
| Fresh berries | 1 cup | Blueberries or raspberries |
The quality of your cream cheese dramatically impacts the final texture of Lemon Cheesecake. Choose full-fat brick-style cream cheese rather than spreadable or reduced-fat versions, as these alternatives contain stabilizers and less fat that prevent proper texture development.
Room temperature ingredients are absolutely essential for smooth, lump-free filling. Cold cream cheese creates lumps that never fully blend, while cold eggs can cause the mixture to curdle. Plan ahead and set everything out at least two hours before you start baking.
How to Make Lemon Cheesecake Step by Step
Step 1: Prepare the Crust
Preheat your oven to 325°F and wrap the outside of a 9-inch springform pan tightly with two layers of heavy-duty aluminum foil. This waterproofing prevents water from the bath from seeping into the pan during baking.
Combine the graham cracker crumbs, sugar, and salt in a medium bowl. Pour the melted butter over the mixture and stir with a fork until all the crumbs are evenly moistened. The mixture should resemble wet sand and hold together when pressed.
Pour the crumb mixture into the prepared springform pan. Use the bottom of a measuring cup or glass to press the crumbs firmly into an even layer across the bottom and about one inch up the sides. The more firmly you press, the better the crust will hold together when you slice the finished cheesecake.
Bake the crust for 10 minutes until it smells toasted and looks set. Remove it from the oven and let it cool while you prepare the filling. This par-baking creates a barrier that prevents the crust from becoming soggy when you add the wet filling.
Step 2: Make the Filling
Beat the room temperature cream cheese in a large bowl with an electric mixer on medium speed for about three minutes until it becomes completely smooth and fluffy with no lumps visible. Scrape down the bowl frequently to ensure even mixing.
Add the sugar and flour, beating on low speed until just incorporated. Increase to medium speed and beat for another two minutes until the mixture looks light and creamy. Don’t overmix, as this incorporates too much air that can cause cracking.
Add the eggs one at a time, beating on low speed just until each egg disappears into the batter before adding the next. Overbeating after adding eggs creates too much air, which expands during baking and causes cracks as it deflates during cooling.
Mix in the sour cream, lemon juice, lemon zest, and vanilla extract on low speed just until combined. The batter should look smooth and pale yellow from the lemon zest. Pour this filling over the cooled crust in the springform pan.
Step 3: Bake in a Water Bath
Place the foil-wrapped springform pan inside a larger roasting pan. Pour hot water into the roasting pan until it reaches about halfway up the sides of the springform pan. This water bath provides gentle, even heat that prevents cracking.
Carefully transfer the roasting pan with both pans to the preheated oven. Bake for 60 to 75 minutes until the edges of the Lemon Cheesecake look set and slightly puffed while the center still jiggles slightly when you gently shake the pan.
The center should look like softly set jello when done. It will firm up considerably during cooling, so don’t wait for it to look completely solid or you’ll end up with overcooked, dense cheesecake.
Turn off the oven and crack the door open about four inches. Let the cheesecake cool in the oven for one hour. This gradual temperature change prevents the dramatic temperature shock that causes cracks.
Step 4: Cool and Chill
After the hour in the cooling oven, remove the cheesecake from the water bath and carefully peel away the aluminum foil. Let it cool to room temperature on a wire rack for another hour.
Run a thin knife around the edge of the pan to loosen the cheesecake from the sides. This prevents the cheesecake from sticking and cracking as it contracts during chilling. Don’t remove the springform ring yet.
Cover the pan loosely with plastic wrap and refrigerate for at least six hours, though overnight is better. The Lemon Cheesecake needs this extended chilling time to fully set and develop its proper texture and flavor.
The filling will firm up significantly during refrigeration, transforming from the slightly jiggly baked state to the dense, creamy texture that defines perfect cheesecake.
Step 5: Release and Serve
When you’re ready to serve, remove the springform pan sides by releasing the clasp and gently lifting the ring away. If the cheesecake sticks, warm the sides of the pan briefly with a hot towel to loosen it.
Use a long, sharp knife to slice the Lemon Cheesecake, wiping the blade clean between each cut for neat slices. Dip the knife in hot water and wipe it dry before each cut for the cleanest results.
Transfer slices to serving plates using a wide spatula. Top each slice with a dollop of whipped cream, a spoonful of lemon curd, or fresh berries if desired.
Serve the cheesecake cold but not ice-cold. Let it sit at room temperature for about 15 minutes before serving for the best flavor and texture.
Storage and Make-Ahead Tips
Store Lemon Cheesecake covered in the refrigerator for up to five days. Cover the entire cheesecake with plastic wrap or store individual slices in airtight containers. The cheesecake actually tastes better on days two and three as the flavors meld and develop.
For advance preparation, make the cheesecake up to three days before your event. The extended chilling time only improves the texture and allows the lemon flavor to permeate throughout the filling.
You can freeze baked and cooled Lemon Cheesecake for up to two months. Wrap it tightly in plastic wrap, then in aluminum foil, and place in a freezer bag. Thaw overnight in the refrigerator before serving.
The texture changes slightly after freezing, becoming a bit denser, but it still tastes delicious. Freeze the cheesecake without toppings, adding fresh whipped cream or fruit after thawing.
Prepare the crust up to two days ahead and store it wrapped in the springform pan at room temperature. Make the filling and bake when you’re ready, though bringing cream cheese to room temperature still takes time.
Individual components can be prepped in stages. Zest and juice lemons ahead of time, storing them separately in the refrigerator. Bring all ingredients to room temperature before mixing the filling for best results.
Common Mistakes and How to Fix Them
One frequent error involves using cold cream cheese straight from the refrigerator. Cold cream cheese won’t blend smoothly no matter how long you beat it, resulting in lumpy filling with uneven texture throughout the baked cheesecake.
Always bring cream cheese to room temperature, which takes about two hours on the counter. If you forgot to set it out, cut it into small cubes to speed the warming process, but never microwave it as this creates hot spots.
Another common mistake is overbeating the batter after adding eggs. Vigorous mixing incorporates excessive air that expands during baking and contracts during cooling, creating those unsightly cracks across the surface.
Mix on low speed and beat just until each egg disappears into the batter. The filling doesn’t need to be perfectly smooth at this stage.
Many people also make the error of overbaking the Lemon Cheesecake. When the center looks completely firm in the oven, it will be overcooked and dense once cooled. The residual heat continues cooking the cheesecake even after you turn off the oven.
Remove the cheesecake when the edges look set but the center still jiggles like jello. Trust this visual cue rather than arbitrary time guidelines, as ovens vary significantly.
Skipping the water bath represents another pitfall. Some bakers find it too fussy or worry about water leaking into the pan. However, the water bath provides gentle, even heat that prevents both cracking and overbaking.
Wrap the pan thoroughly with heavy-duty foil and don’t skip this crucial step. The dramatic improvement in texture and appearance justifies the small extra effort.
Using bottled lemon juice instead of fresh creates flavor problems. Bottled juice tastes flat and artificial compared to fresh, and it lacks the aromatic oils found in fresh lemon zest.
Always use fresh lemons for Lemon Cheesecake. The investment in fresh citrus makes an enormous difference in the final flavor.
Finally, many cooks rush the cooling and chilling process. Removing the cheesecake from the oven too quickly causes temperature shock that creates cracks. Slicing it before it’s fully chilled results in messy, soft slices.
Follow the gradual cooling process and refrigerate for the full recommended time. Patience during these final steps ensures your beautiful cheesecake looks as good as it tastes.
Variations
The classic Lemon Cheesecake welcomes several delicious variations while maintaining its essential character. For raspberry lemon cheesecake, swirl raspberry puree through the filling before baking. Drop spoonfuls of seedless raspberry jam over the filling and swirl gently with a knife for beautiful marbled effect.
The tart raspberries complement the lemon beautifully and add gorgeous color contrast.
Blueberry lemon cheesecake tops the baked and chilled cheesecake with fresh blueberry compote. Simmer fresh or frozen blueberries with sugar and lemon juice until thickened, then cool and spread over the cheesecake.
This combination tastes like summer in dessert form and looks stunning with the purple-blue topping.
For no-bake lemon cheesecake, replace the eggs with additional sour cream and unflavored gelatin to set the filling. Beat the cream cheese with sugar and lemon, fold in whipped cream, pour into the crust, and chill until firm.
This version offers lighter texture and easier preparation, though it lacks the dense richness of baked versions.
Lemon lavender cheesecake incorporates one tablespoon of culinary lavender steeped in the warm cream or sour cream before adding to the filling. Strain out the lavender before mixing.
The floral notes create sophisticated complexity that impresses at elegant gatherings.
Mini lemon cheesecakes bake individual portions in muffin tins lined with paper cups. Use the same filling but reduce baking time to 20 to 25 minutes. These personal cheesecakes look adorable and eliminate the need for slicing.
Greek yogurt lemon cheesecake replaces half the cream cheese with thick Greek yogurt for tangier, lighter texture. The increased protein makes the dessert slightly more nutritious while maintaining delicious flavor.
Serving Suggestions
Lemon Cheesecake shines as an elegant finale to special dinners. Serve it on pretty dessert plates with a dusting of powdered sugar and a sprig of fresh mint for simple, sophisticated presentation.
Add a few fresh berries and a small dollop of whipped cream for color and textural contrast.
For afternoon tea or brunch service, cut smaller, more delicate slices. The rich cheesecake satisfies in modest portions, and daintier slices look elegant on fine china.
Serve alongside coffee or tea, with lemon slices and fresh flowers on the table for a complete sensory experience.
Lemon Cheesecake pairs beautifully with fresh fruit compotes. Macerated strawberries, blueberry sauce, or mixed berry coulis add fruity brightness that complements the tangy lemon.
The juicy fruit also provides moisture that balances the dense cheesecake texture.
For special occasions, drizzle each slice with homemade lemon curd or lemon glaze. The extra lemon intensity delights citrus lovers and creates a more dramatic presentation.
Garnish with candied lemon peel or fresh edible flowers for celebrations.
Beverage pairings enhance the cheesecake experience. Serve with dessert wine like late-harvest Riesling or Moscato d’Asti, which echo the lemon’s fruity sweetness.
Champagne or sparkling wine also works beautifully, especially for celebrations. The bubbles cleanse your palate between bites.
For casual gatherings, serve Lemon Cheesecake with strong coffee or espresso. The bitter coffee balances the sweet, rich dessert perfectly, and the combination feels comforting and satisfying.
Frequently Asked Questions
Why did my Lemon Cheesecake crack?
Cracks typically result from overbaking, overmixing air into the batter, or rapid temperature changes during cooling. Bake only until the edges set while the center still jiggles, mix gently after adding eggs, and cool gradually in the turned-off oven with the door cracked. Following these steps prevents most cracking issues.
Can I make Lemon Cheesecake without a water bath?
You can skip the water bath, though the results won’t be as creamy and cracks become more likely. If you must skip it, reduce the oven temperature to 300°F and bake longer, checking frequently. The lower temperature provides gentler heat that somewhat compensates for the missing water bath.
How do I know when my cheesecake is done?
The Lemon Cheesecake is done when the edges look set and slightly puffed while the center three inches still jiggle like jello when you gently shake the pan. An instant-read thermometer inserted in the center should read 150°F. The center will firm up during cooling.
Can I use low-fat cream cheese?
Low-fat cream cheese produces acceptable but inferior results. The reduced fat content creates less creamy texture and can make the cheesecake more prone to cracking. For the best Lemon Cheesecake, always use full-fat brick-style cream cheese.
Why is my cheesecake lumpy?
Lumps result from cold cream cheese that didn’t blend properly. Always bring cream cheese to room temperature before mixing, beat it thoroughly before adding other ingredients, and scrape down the bowl frequently. If you already have lumps, press the batter through a fine-mesh sieve before baking.
How long does Lemon Cheesecake need to chill?
Chill Lemon Cheesecake for at least six hours, though overnight produces better results. The extended chilling time allows the filling to fully set and the flavors to develop. Slicing too early results in soft, messy slices that don’t hold their shape.
Can I freeze Lemon Cheesecake?
Yes, freeze baked and cooled cheesecake for up to two months. Wrap it tightly in plastic wrap and aluminum foil, then place in a freezer bag. Thaw overnight in the refrigerator before serving. The texture becomes slightly denser but still tastes delicious.
What can I use instead of graham crackers for the crust?
Try vanilla wafers, shortbread cookies, or digestive biscuits crushed to fine crumbs. Each creates slightly different flavor but works well structurally. Use the same proportions of crumbs, sugar, and butter regardless of the cookie type.
How do I remove the cheesecake from the springform pan?
Run a thin knife around the edge before releasing the springform clasp. If the cheesecake sticks, warm the pan sides with a hot towel to loosen it. Lift away the ring gently. Leave the cheesecake on the metal base for easiest serving.
Making Lemon Cheesecake at home transforms special occasions into memorable celebrations with a dessert that tastes as incredible as it looks. The bright citrus flavor, creamy texture, and elegant appearance create the perfect finale to any meal worth remembering.
Once you master the straightforward techniques, you’ll find yourself making this cheesecake again and again for different occasions. The reliable results and universal appeal make it one of the most valuable recipes in your dessert repertoire.
Give this recipe a try for your next celebration, and prepare for the compliments that will follow every silky, tangy slice of your homemade Lemon Cheesecake.