
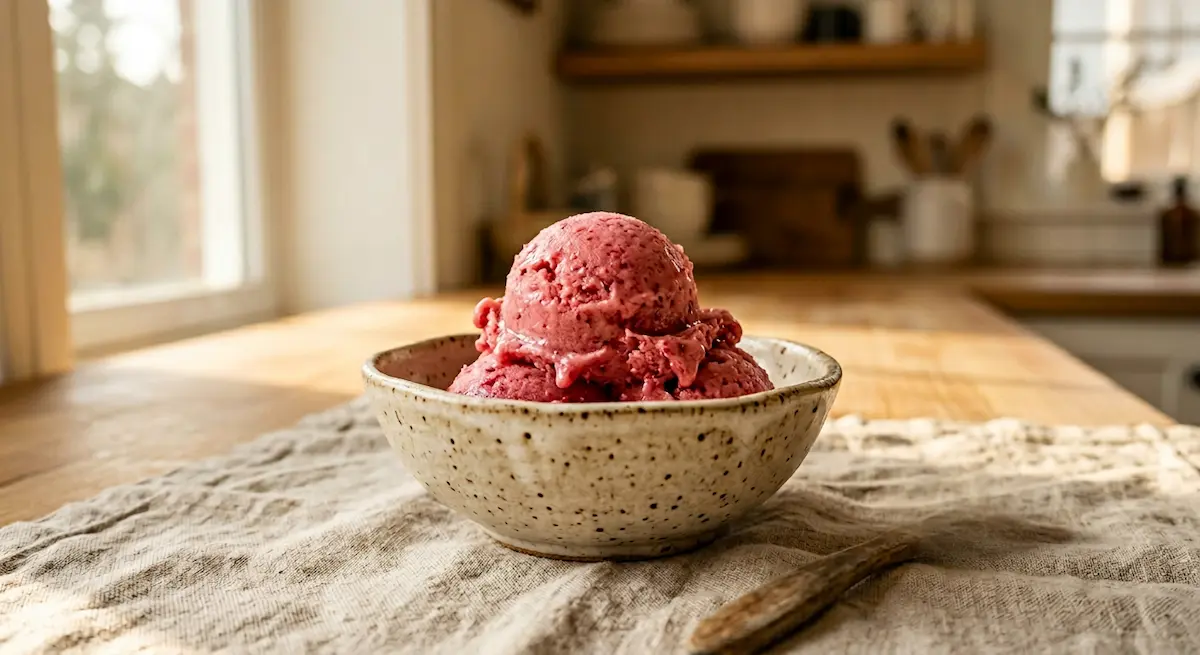
How to Make the Best Raspberry Sherbet in 4 Easy Steps
Remember those sweltering summer afternoons when only something cold, fruity, and creamy could possibly satisfy? Raspberry sherbet delivers exactly that refreshing escape a frozen dessert that balances bright berry tartness with just enough sweetness and creaminess to feel indulgent without the heaviness of ice cream. This vibrant pink treat captures summer in a scoop, whether you make it in July or crave a taste of sunshine in the middle of winter.
Moreover, homemade raspberry sherbet tastes worlds better than store-bought versions, with real fruit flavor that pops on your tongue and a silky texture that melts perfectly. Throughout this comprehensive guide, you’ll discover exactly how to create restaurant-quality raspberry sherbet in your own kitchen, along with expert tips for perfect texture, brilliant color, and that ideal balance of sweet and tart that makes this frozen dessert absolutely irresistible.
Table of Contents
What is Raspberry Sherbet
Raspberry sherbet is a frozen dessert made from fresh or frozen raspberries, sugar, and a small amount of dairy typically milk or cream that creates a texture lighter than ice cream but creamier than sorbet. The dairy content in sherbet usually ranges from 1 to 2 percent milk fat, which gives it that characteristic smooth, scoopable consistency without the richness of full-fat ice cream.
Furthermore, sherbet differs from both ice cream and sorbet in important ways. Ice cream contains at least 10 percent milk fat and often includes egg yolks, creating a rich, dense texture. Sorbet contains no dairy at all, relying entirely on fruit, sugar, and water for its composition. Therefore, sherbet occupies a delightful middle ground fruity and refreshing like sorbet, but with added creaminess from dairy that makes it more indulgent and easier to scoop.
Additionally, raspberry sherbet showcases the natural tartness of raspberries beautifully. The berries’ bright acidity balances perfectly with sugar and dairy, creating a dessert that tastes intensely fruity without being overwhelmingly sweet. The vibrant pink color comes naturally from the raspberries themselves, making this dessert as visually appealing as it is delicious.
Why You Will Love This Raspberry Sherbet
First and foremost, the flavor of homemade raspberry sherbet is absolutely spectacular. Fresh raspberries deliver a pure, intense berry taste that commercial versions simply cannot match. Each spoonful bursts with genuine fruit flavor, bright acidity, and natural sweetness that tastes like summer itself.
Additionally, this dessert offers a lighter alternative to heavy ice creams without sacrificing satisfaction. The lower fat content means you can enjoy a generous serving without feeling overly full or weighted down. Therefore, raspberry sherbet makes the perfect ending to rich meals or a refreshing afternoon treat when you want something sweet but not too heavy.
Another compelling reason to make this recipe is its versatility for different dietary needs. You can easily make dairy-free versions using coconut milk or almond milk, adjust sweetness levels to match your preferences, or add mix-ins like chocolate chips or fresh mint. The base recipe welcomes experimentation while remaining simple and reliable.
Moreover, the gorgeous color of raspberry sherbet makes it perfect for entertaining. Serve it at summer parties, birthday celebrations, or holiday gatherings, and watch guests light up at the vibrant pink scoops. It looks professional and impressive despite being remarkably easy to make at home.
Finally, making sherbet yourself costs a fraction of premium store-bought versions while tasting infinitely better. A pint of high-quality commercial sherbet can cost several dollars, while making it at home with fresh ingredients costs less and yields more, all while giving you complete control over quality and flavor intensity.
Ingredients
Creating exceptional raspberry sherbet requires just a handful of simple ingredients that combine to create something truly special. Quality matters here the better your raspberries, the better your final result.
Main Ingredients
| Ingredient | Amount | Notes |
|---|---|---|
| Fresh or frozen raspberries | 4 cups | Frozen works great; no need to thaw |
| Granulated sugar | ¾ cup | Adjust based on berry sweetness |
| Whole milk | 1 cup | 2% works too; affects creaminess |
| Heavy cream | ½ cup | Creates silky texture; half-and-half substitutes |
| Fresh lemon juice | 2 tablespoons | Brightens flavor and balances sweetness |
| Vanilla extract | 1 teaspoon | Enhances berry flavor subtly |
| Salt | Pinch | Amplifies overall flavor |
Optional Add-ins
| Ingredient | Amount | Notes |
|---|---|---|
| Corn syrup | 2 tablespoons | Improves texture and scoopability |
| Vodka | 1 tablespoon | Keeps sherbet softer; alcohol mostly evaporates |
| Fresh mint leaves | 2 tablespoons chopped | Adds refreshing herbal note |
| Lime zest | 1 teaspoon | Citrus twist variation |
| Honey | Replace ¼ cup sugar | Natural sweetness with floral notes |
The raspberries form the star of raspberry sherbet, providing both flavor and that gorgeous pink color. Fresh raspberries at peak season deliver the most intense flavor, but frozen berries work beautifully year-round and are often picked at perfect ripeness. Don’t thaw frozen berries before using them they puree more easily when frozen and create a thicker base.
Meanwhile, the combination of milk and cream creates the characteristic sherbet texture. The milk keeps it light and refreshing, while the cream adds just enough richness to make it feel indulgent. This balance is what distinguishes sherbet from both ice cream and sorbet, creating that perfect middle-ground texture.
How to Make Raspberry Sherbet Step by Step
Creating smooth, scoopable raspberry sherbet involves careful blending and freezing techniques that ensure perfect texture. Follow these detailed steps for consistently excellent results.
Step 1: Blend the Raspberry Base
Place the raspberries, sugar, and lemon juice in a blender or food processor. Blend on high speed for about 1 minute until the mixture becomes completely smooth and the sugar dissolves into the fruit. The lemon juice not only adds brightness but also helps break down the fruit and prevents the sherbet from tasting flat or one-dimensional.
Once smooth, strain the mixture through a fine-mesh sieve into a large bowl. Use a spatula or the back of a spoon to press the puree through, extracting as much liquid as possible while leaving the seeds behind. This step is crucial because raspberry seeds can create an unpleasant grainy texture in the frozen sherbet. Take your time and press firmly to maximize the amount of seedless puree you collect.
After straining, you should have about 2 cups of bright red raspberry puree. Taste it at this point and adjust the sugar if needed. Keep in mind that freezing dulls sweetness slightly, so the mixture should taste a bit sweeter than you want the final sherbet to be.
Step 2: Combine with Dairy and Flavorings
Add the milk, heavy cream, vanilla extract, and salt to the raspberry puree. Whisk everything together thoroughly until the mixture is completely uniform in color and texture. The dairy will lighten the vibrant red puree to a beautiful pink shade.
If you’re using optional ingredients like corn syrup or vodka, add them now and whisk until fully incorporated. The corn syrup helps prevent large ice crystals from forming, creating a smoother texture. Meanwhile, the small amount of alcohol lowers the freezing point slightly, which keeps the raspberry sherbet from freezing rock-hard and makes it easier to scoop.
Cover the bowl with plastic wrap and refrigerate the mixture for at least 2 hours, or preferably overnight. This chilling step is important because it allows flavors to meld and ensures the mixture is thoroughly cold before churning. Starting with a cold base results in faster freezing and better texture in the final sherbet.
Step 3: Churn in an Ice Cream Maker
Pour the chilled raspberry mixture into your ice cream maker and churn according to the manufacturer’s instructions. This typically takes 20 to 25 minutes, though timing varies by machine. The sherbet is ready when it reaches a soft-serve consistency thick enough to hold its shape but still soft and creamy.
During churning, the machine incorporates air while freezing the mixture simultaneously. This creates the smooth, scoopable texture that makes raspberry sherbet so enjoyable. Don’t over-churn or the sherbet can become grainy. Stop the machine as soon as it reaches soft-serve consistency.
If you don’t have an ice cream maker, you can still make sherbet using the freeze-and-stir method. Pour the mixture into a shallow pan and freeze for 45 minutes. Remove and stir vigorously with a fork or whisk, breaking up ice crystals. Repeat this process every 30 minutes for 3 to 4 hours until the sherbet reaches the desired consistency. This method takes longer and requires more attention, but it works well in a pinch.
Step 4: Freeze Until Firm
Transfer the churned raspberry sherbet to a freezer-safe container with a tight-fitting lid. Press a piece of plastic wrap directly onto the surface of the sherbet to prevent ice crystals from forming. Seal the container and freeze for at least 4 hours, or until the sherbet firms up to a scoopable consistency.
The sherbet will be quite soft immediately after churning perfect for soft-serve-style eating if you prefer. However, most people enjoy sherbet at a firmer consistency, which requires this additional freezing time. The sherbet continues to harden in the freezer, developing that classic scoopable texture.
Before serving, let the raspberry sherbet sit at room temperature for 5 to 10 minutes to soften slightly. This makes scooping easier and allows the flavors to bloom more fully. If it’s frozen extremely hard, microwave the container for 10 seconds at a time until it reaches ideal scooping consistency.
Storage and Make-Ahead Tips
Homemade raspberry sherbet stores beautifully in the freezer for up to 2 months when kept in an airtight container. Always press plastic wrap directly against the surface before sealing to prevent freezer burn and ice crystal formation. Store it toward the back of your freezer where temperature remains most constant, rather than in the door where temperature fluctuates.
For optimal texture, try to consume the sherbet within the first month. While it remains safe to eat for 2 months, the texture gradually becomes icier over time as ice crystals slowly form and grow. The flavor stays excellent, but the silky texture diminishes slightly with extended storage.
Furthermore, you can prepare the raspberry base mixture up to 3 days in advance. Store the strained, mixed base in the refrigerator until you’re ready to churn it. In fact, longer chilling times often result in better texture because the mixture becomes thoroughly cold and the flavors develop more complexity.
Additionally, you can make raspberry sherbet without an ice cream maker by using the freeze-and-stir method mentioned earlier. While this requires more hands-on time, it produces excellent results and allows you to make sherbet without special equipment. Just plan for several hours of freezing and stirring time.
For serving at parties, scoop the sherbet into portions ahead of time. Place individual scoops on a parchment-lined baking sheet and freeze until solid, then transfer to a container. This allows you to serve quickly without struggling to scoop hard-frozen sherbet while guests wait.
Common Mistakes and How to Fix Them
One of the most frequent errors when making raspberry sherbet is skipping the straining step. Leaving raspberry seeds in the mixture creates an unpleasant grainy texture that distracts from the otherwise smooth, creamy sherbet. Always strain thoroughly, even though it requires a bit of patience and effort.
Another common mistake involves not chilling the base mixture before churning. Room-temperature or warm mixtures take much longer to freeze in the ice cream maker, which can result in larger ice crystals and a coarser texture. Always chill your base for at least 2 hours, preferably overnight, before churning.
Moreover, many people over-sweeten their sherbet base. Remember that freezing dulls sweetness perception, but going overboard makes the sherbet cloying rather than refreshing. Taste your base before churning—it should be slightly sweeter than you want the final product, but not aggressively so.
Furthermore, using only milk without any cream results in an icy, hard texture that’s difficult to scoop. The small amount of cream in raspberry sherbet provides essential fat that creates smoothness and prevents the dessert from freezing rock-hard. Don’t skip the cream or substitute with all milk.
Finally, storing sherbet in containers with too much air space allows ice crystals to form on the surface. Always use containers sized appropriately for the amount of sherbet you’re storing, and press plastic wrap directly against the surface before sealing to minimize air exposure.
Variations
The basic raspberry sherbet recipe welcomes creative variations that keep this frozen treat interesting. For a mixed berry version, replace half the raspberries with strawberries or blackberries. This creates a more complex berry flavor while maintaining that beautiful pink color.
If you prefer a tropical twist, combine raspberries with mango or pineapple. Use 2 cups raspberries and 2 cups of your chosen tropical fruit for a vacation-in-a-bowl flavor combination that’s both refreshing and unexpected. The tropical fruit adds natural sweetness that balances raspberry tartness beautifully.
For a sophisticated adult version, add 2 tablespoons of raspberry liqueur or Chambord to the mixture before churning. This intensifies the raspberry flavor while adding subtle complexity. The alcohol also helps keep the raspberry sherbet slightly softer and easier to scoop.
Additionally, try a chocolate-raspberry variation by stirring in ½ cup of finely chopped dark chocolate or mini chocolate chips during the last minute of churning. The chocolate pieces add textural interest and create that classic flavor pairing that never disappoints.
For a refreshing herb-infused sherbet, steep fresh basil or mint leaves in the warm milk before adding it to the raspberry puree. Strain out the herbs before churning. This creates an elegant, garden-fresh flavor that elevates the sherbet from simple to sophisticated.
Another popular variation uses honey instead of some or all of the granulated sugar. Honey adds floral notes and creates a slightly softer texture due to its different sugar composition. Replace up to half the sugar with honey for best resultsusing all honey can make the flavor too distinct.
Serving Suggestions
Raspberry sherbet shines on its own as a simple, refreshing dessert, but several serving ideas elevate it further. Serve scoops in chilled glass bowls with fresh raspberries and mint sprigs for an elegant presentation that looks restaurant-worthy. The contrast between frozen sherbet and fresh berries creates wonderful textural variety.
For special occasions, create sherbet floats by placing a generous scoop of raspberry sherbet in a tall glass and topping it with sparkling water, lemon-lime soda, or champagne for an adult version. The effervescence combines with the creamy sherbet to create a refreshing, celebratory drink-dessert hybrid.
Moreover, use sherbet as a palate cleanser between courses during multi-course meals. Small portions of raspberry sherbet served in tiny bowls or cups refresh the palate beautifully after rich appetizers or before dessert, following the European tradition of serving frozen treats mid-meal.
Additionally, layer sherbet with pound cake or angel food cake cubes, whipped cream, and fresh berries to create a beautiful trifle. The cold sherbet contrasts wonderfully with soft cake and billowy cream, creating a show-stopping dessert for summer gatherings.
For children’s parties, serve raspberry sherbet in ice cream cones or create sherbet sandwiches by placing a scoop between two cookies. Kids love the bright color and fruity flavor, while parents appreciate that it’s lighter and less messy than full-fat ice cream.
Furthermore, blend sherbet with milk to create thick, fruity milkshakes that kids and adults both adore. Add a handful of fresh or frozen berries for extra fruit flavor and gorgeous pink color that makes these shakes Instagram-worthy.
Frequently Asked Questions
What’s the difference between sherbet and sorbet?
Raspberry sherbet contains a small amount of dairy (1-2% milk fat), which creates a creamier texture than sorbet. Sorbet is completely dairy-free and made only from fruit, sugar, and water, resulting in a lighter, icier texture. Sherbet falls between sorbet and ice cream in richness and creaminess.
Can I make raspberry sherbet without an ice cream maker?
Yes! Use the freeze-and-stir method by freezing the mixture in a shallow pan and stirring vigorously every 30 minutes for 3 to 4 hours. This breaks up ice crystals and incorporates air. While more labor-intensive than using a machine, it produces excellent results without special equipment.
Why is my sherbet icy instead of smooth?
Icy texture typically results from not churning long enough, starting with a warm base, or storing improperly. Always chill your mixture thoroughly before churning, churn until it reaches soft-serve consistency, and store with plastic wrap pressed against the surface to prevent ice crystal formation.
Can I use frozen raspberries instead of fresh?
Absolutely! Frozen raspberries work beautifully for raspberry sherbet and are often more economical and convenient than fresh. Don’t thaw them before blendin they puree easily when frozen and create a thicker base that chills faster.
How long does homemade raspberry sherbet last?
Store homemade sherbet in an airtight container in the freezer for up to 2 months. For best texture, consume within the first month. The flavor remains excellent throughout the storage period, but texture gradually becomes slightly icier over time.
Can I reduce the sugar in raspberry sherbet?
You can reduce sugar slightly, but too little affects both flavor and texture. Sugar not only sweetens but also prevents the sherbet from freezing rock-hard. If reducing sugar, add 1 to 2 tablespoons of corn syrup to maintain proper texture and scoopability.
Is sherbet healthier than ice cream?
Raspberry sherbet contains significantly less fat than ice cream and often fewer calories per serving. However, it typically contains similar amounts of sugar. It offers a lighter option that feels less heavy after eating, making it a nice alternative when you want frozen dessert without extreme richness.
Why do I need to strain the raspberry seeds?
Raspberry seeds create an unpleasant grainy, gritty texture in frozen desserts. Straining removes the seeds while preserving all the beautiful color and intense fruit flavor, resulting in smooth, silky sherbet that melts perfectly on your tongue.
Making homemade raspberry sherbet proves that the best frozen desserts don’t require complicated techniques or professional equipment. With just a few simple ingredients and some patience, you create a frozen treat that rivals anything from premium ice cream shops while costing a fraction of the price.
The vibrant color, intense fruit flavor, and perfect balance of creamy and refreshing make this sherbet a summer staple you’ll return to year after year. Whether you enjoy it straight from the freezer on hot afternoons or dress it up for special occasions, this versatile dessert never disappoints.
So grab your fresh raspberries, chill your ice cream maker bowl, and discover just how easy and rewarding it is to make restaurant-quality raspberry sherbet in your own kitchen. Once you taste the difference homemade makes, you’ll never settle for store-bought again.